
For the trusted readers of my blog 😉 yes, this is another event driven architecture topic! And this time we’ll be diving into WMI Events with PowerShell!
PowerShell is more than just a scripting language; in fact, it’s a bridge to the heart of Windows. Moreover, one of the coolest things hiding in its toolbox is event-driven scripting with Register-CimIndicationEvent”
Yes, you read that right. We’re not just reacting to file changes or custom triggers this time! We’re tapping directly into the Windows Management Instrumentation (WMI) universe. Think of WMI as the Windows gossip system: every process, service, or hardware change is announced, and with PowerShell, you can eavesdrop and react instantly.
So buckle up, because we’re going to see how Register-CimIndicationEvent can help you automate responses to system-level events like a true Windows detective. 🕵️♂️
During this post, you’ll see this icon 🎬, which indicates that action is required so you get the full benefit out of this post.
And I’ve introduced the 📒, which indicates that the subsequent part explains the technical details in the context of this post.
Let’s get started!
In our toolbelt
The cmdlet of the day is called … 🥁🥁🥁 Register-CimIndicationEvent.
This little powerhouse is your gateway into the modern Windows Management Instrumentation (CIM) world. Think of it as Windows whispering every tiny change, but this time over a more modern, firewall-friendly channel. With this cmdlet, you’re not just running scripts. For example, you’re subscribing directly to the system and saying: ‘Hey, let me know when something interesting happens.’
A mouthful, yes, but the magic is real! With Register-CimIndicationEvent, you can hook into events that Windows fires constantly, such as:
- Process creation or termination
- Service start/stop
- USB device insertions
- Scheduled tasks running
Pretty much anything CIM exposes!
Instead of polling or constantly checking ‘is it done yet?’, you can let Windows do the hard work. Consequently, you only react when an event actually occurs 🚀
PowerShell Process Detective
All those processes running on your machine! So, how do you know when something new sneaks in? Well, grab a coffee ☕ because we’re about to become Windows detectives (the friendly kind 😉).
Whether it’s Notepad, Calculator, or some mysterious background process, PowerShell can quietly watch your system and give you a heads-up the moment something starts. No constant polling, no refreshing Task Manager, just instant alerts, like magic.
But… with great power comes responsibility. You don’t want to flood your console with every tiny process, so let’s start simple and see how it works step by step.
🎬 Time to make your hands dirty! Follow the steps below for making your first PowerShell detective!
💡 You might need to run with elevated permissions in order to attach to these system events!
- Create the event handler – Enter the following code in your PowerShell session:
Register-CimIndicationEvent -Query "SELECT * FROM __InstanceCreationEvent WITHIN 1 WHERE TargetInstance ISA 'Win32_Process'" -SourceIdentifier "ProcessWatcher" -Action {
	    param($sender, $e)

	    # For CimIndicationEventInstanceEventArgs, the event data is in NewEvent directly
	    $newEvent = $e.NewEvent
	    $targetInstance = $newEvent.TargetInstance

	    if ($targetInstance) {
	        Write-Host "New process: $($targetInstance.Name) (PID: $($targetInstance.ProcessId)) - Path: $($targetInstance.ExecutablePath)"
	    } else {
	        Write-Host "TargetInstance is null - Event: $($newEvent.CimInstanceProperties.Name -join ', ')"
	    }
}- Start a process – Open Notepad, Calculator, or any application you like
- Check the result – Your PowerShell window should immediately show something like:

New process: notepad.exe
🥳 Success! Your event handler is now silently monitoring for new processes and reporting them in real-time. No extra tools needed, just PowerShell magic!
Exploring Events
Curious what kind of events Windows can actually whisper to us? Well, let’s take a quick tour before we start subscribing. 🕵️♂️
With CIM, almost everything that happens on your system! Processes starting, services changing state, USB devices being plugged in all have a corresponding CIM class. To see what’s available, you can run this little explorer command!
This will list all CIM classes related to events and traces. Think of it as peeking behind the curtain of Windows: you’ll see Win32_ProcessStartTrace, Win32_VolumeChangeEvent, and many more waiting for you to subscribe and react.
🎬 Run the PowerShell command below
- Run the command
Get-CimClass | Where-Object {$_.CimClassName -like "*Event*" -or $_.CimClassName -like "*Trace*"} | Select-Object CimClassName- Your result should look like below
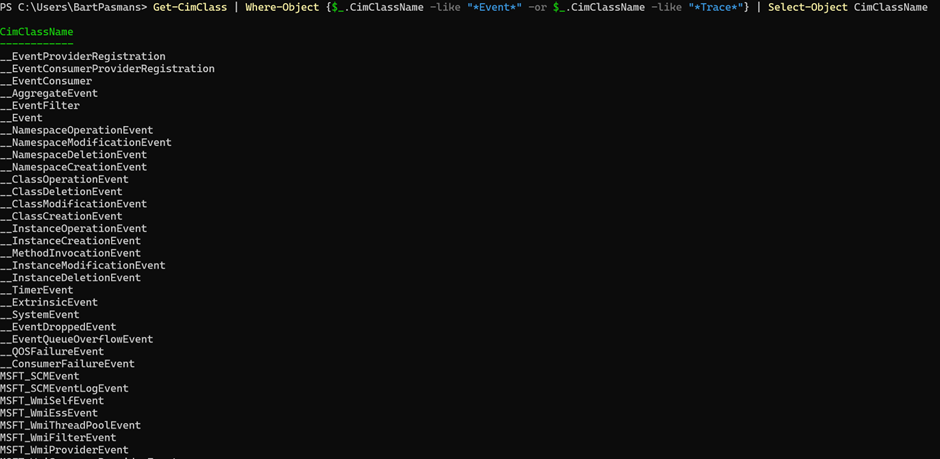
📒 What this tells you
Each class in this list represents a type of event you can subscribe to. For example:
- Win32_ProcessStartTrace → triggers when a new process starts
- Win32_VolumeChangeEvent → triggers when a drive or USB device is added/removed
- Win32_ServiceChangeEvent → triggers when a service changes state
All sorts of events you can attach to using the code shown as before!
Create your own Queries
Worried about writing all those WQL or CIM queries yourself? Don’t be! 😎 There’s a much easier way to explore what’s available!
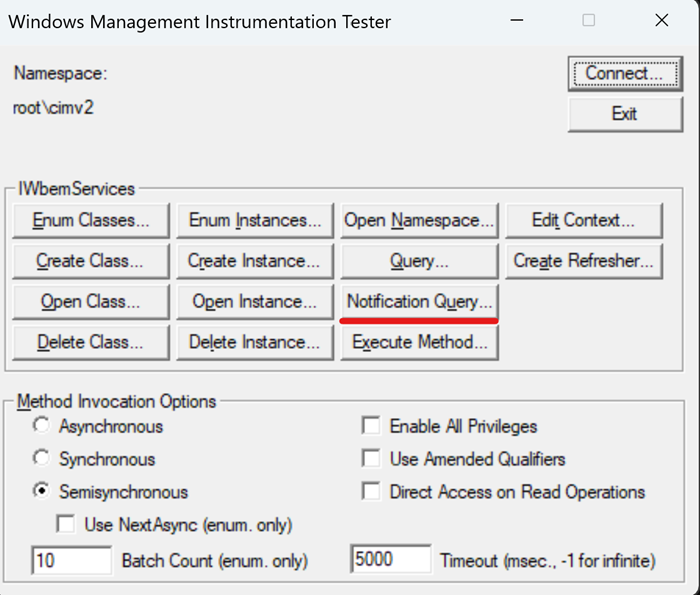
Windows Management Instrumentation Tester (wbemtest)! this free GUI tool lets you browse all the WMI/CIM classes, their properties, and even see example queries, all without memorizing the syntax. You can click through Win32_ProcessStartTrace, Win32_VolumeChangeEvent, Win32_ServiceChangeEvent, and dozens of others, then copy the exact query you need into your PowerShell script.
It’s like having a treasure map for Windows events, find what you need visually, then let PowerShell do the magic. No guessing, no trial-and-error, just clean, working event
🎬 Follow the steps below to find those properties
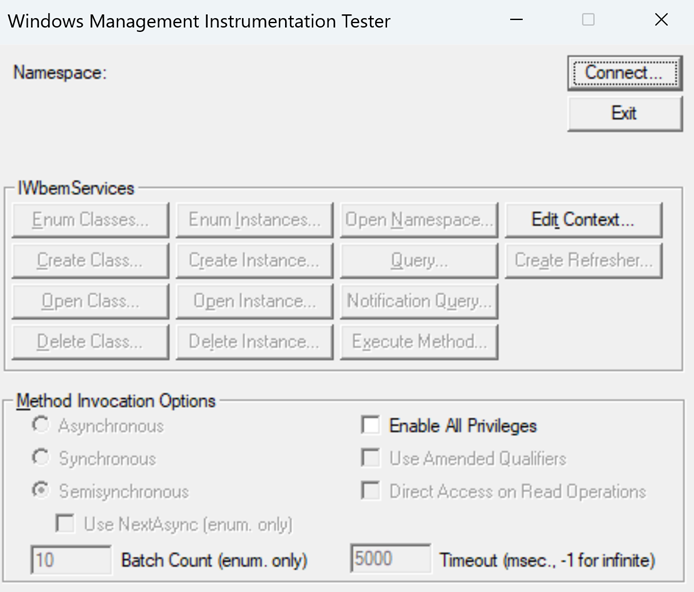
- Press connect and connect to ‘root\cimv2’
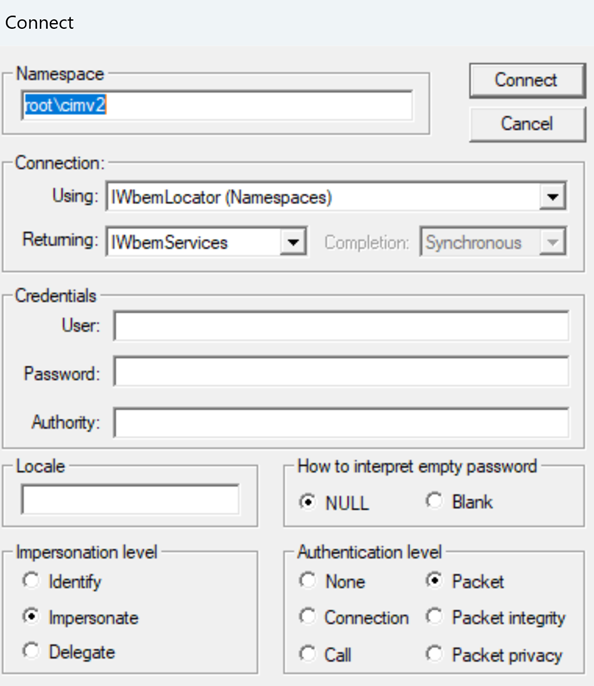
- Press connect again
- Now click on notification query
- And enter the query from our PowerShell script there as well
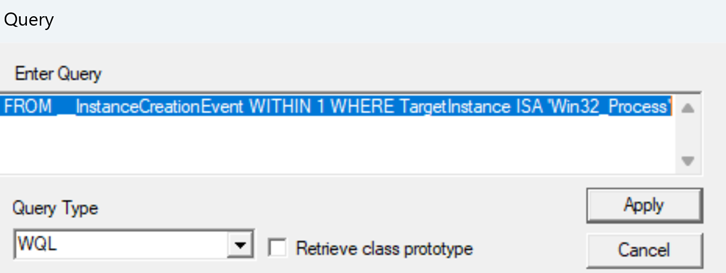
- Press ‘Apply’ and wait or start a process to make entries appear like below
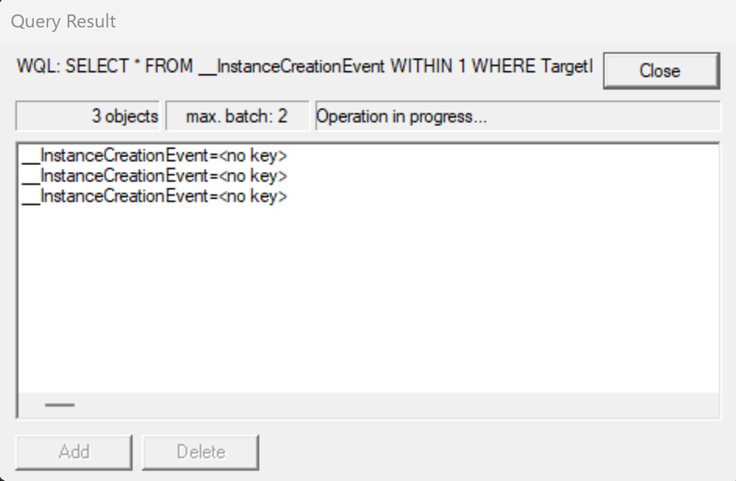
- Now double click one of those entries and the details will pop-up
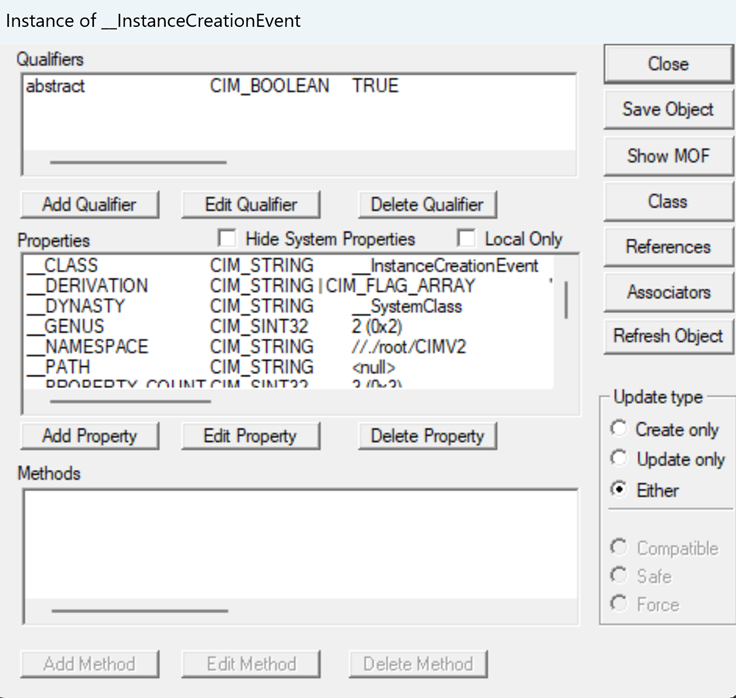
By now clicking ‘Show MOF’ you can see the output:
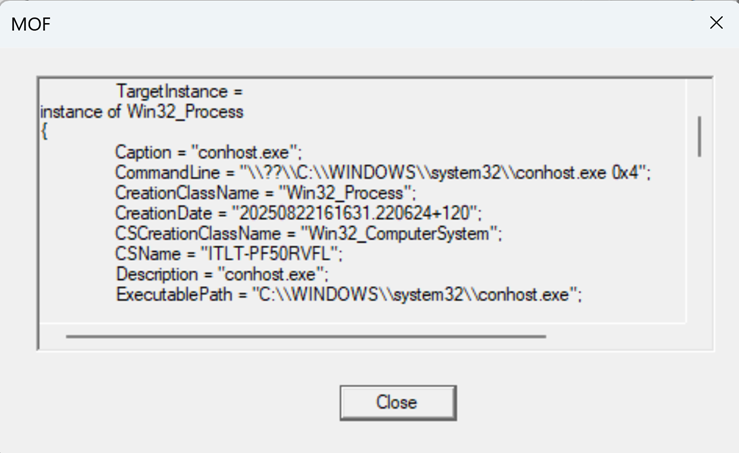
And all the output:
instance of __InstanceCreationEvent
{
	TargetInstance =
instance of Win32_Process
{
	Caption = "conhost.exe";
	CommandLine = "\\??\\C:\\WINDOWS\\system32\\conhost.exe 0x4";
	CreationClassName = "Win32_Process";
	CreationDate = "20250822161631.220624+120";
	CSCreationClassName = "Win32_ComputerSystem";
	CSName = "";
	Description = "conhost.exe";
	ExecutablePath = "C:\\WINDOWS\\system32\\conhost.exe";
	Handle = "1808";
	HandleCount = 95;
	KernelModeTime = "0";
	MaximumWorkingSetSize = 1380;
	MinimumWorkingSetSize = 200;
	Name = "conhost.exe";
	OSCreationClassName = "Win32_OperatingSystem";
	OSName = "Microsoft Windows 11 Enterprise|C:\\WINDOWS|\\Device\\Harddisk0\\Partition3";
	OtherOperationCount = "82";
	OtherTransferCount = "1634";
	PageFaults = 1980;
	PageFileUsage = 1220;
	ParentProcessId = 60460;
	PeakPageFileUsage = 1312;
	PeakVirtualSize = "2203456843776";
	PeakWorkingSetSize = 7592;
	Priority = 8;
	PrivatePageCount = "1249280";
	ProcessId = 1808;
	QuotaNonPagedPoolUsage = 9;
	QuotaPagedPoolUsage = 110;
	QuotaPeakNonPagedPoolUsage = 9;
	QuotaPeakPagedPoolUsage = 194;
	ReadOperationCount = "0";
	ReadTransferCount = "0";
	SessionId = 1;
	ThreadCount = 3;
	UserModeTime = "0";
	VirtualSize = "2203418353664";
	WindowsVersion = "10.0.26100";
	WorkingSetSize = "7766016";
	WriteOperationCount = "0";
	WriteTransferCount = "0";
};
	TIME_CREATED = "134003457913451951";
};📒 This information on its turn can be used in your script to extend to whatever you want 😊
On the Microsoft pages
On the Microsoft pages you can find a lot of information on WMI classes! You can find all the required documentation here:
https://learn.microsoft.com/en-us/windows/win32/wmisdk/wmi-reference
What I’ve used for my blog can be for instance found at:
https://learn.microsoft.com/en-us/windows/win32/wmisdk/–instancecreationevent
Summary
That’s a wrap! 🎉
In this blog, we explored the hidden power of Register-CimIndicationEvent in PowerShell for true event-driven scripting on Windows 💙.
We started by understanding WMI/CIM as Windows’ internal “announcement system,” letting us eavesdrop on events like process creation, service state changes, USB insertions, and more—without constantly polling the system ☕️.
We then became Windows detectives, building a simple PowerShell event handler to monitor new processes in real-time. No extra tools, just PowerShell magic! 🕵️♂️✨
Next, we took a tour of CIM classes, discovering which events Windows can whisper to us, and learned how to get started by creating our own query, manually or using the WMI Tester GUI (wbemtest) to explore event properties and capture data for our scripts.
📒 This post is all about leveraging WMI/CIM with PowerShell to automate responses to system-level events, giving you a lightweight, reactive monitoring setup.
🎬 If you followed along, you now have a working framework to detect, log, and respond to Windows events in real-time, ready to extend into your own projects.
If you want to know more about how to create these queries let me know! I might include it in my future blogs 😉
Happy query’ng!
Thanks for reading! I hope this inspires you to dive deeper into event-driven PowerShell automation 🚀.