
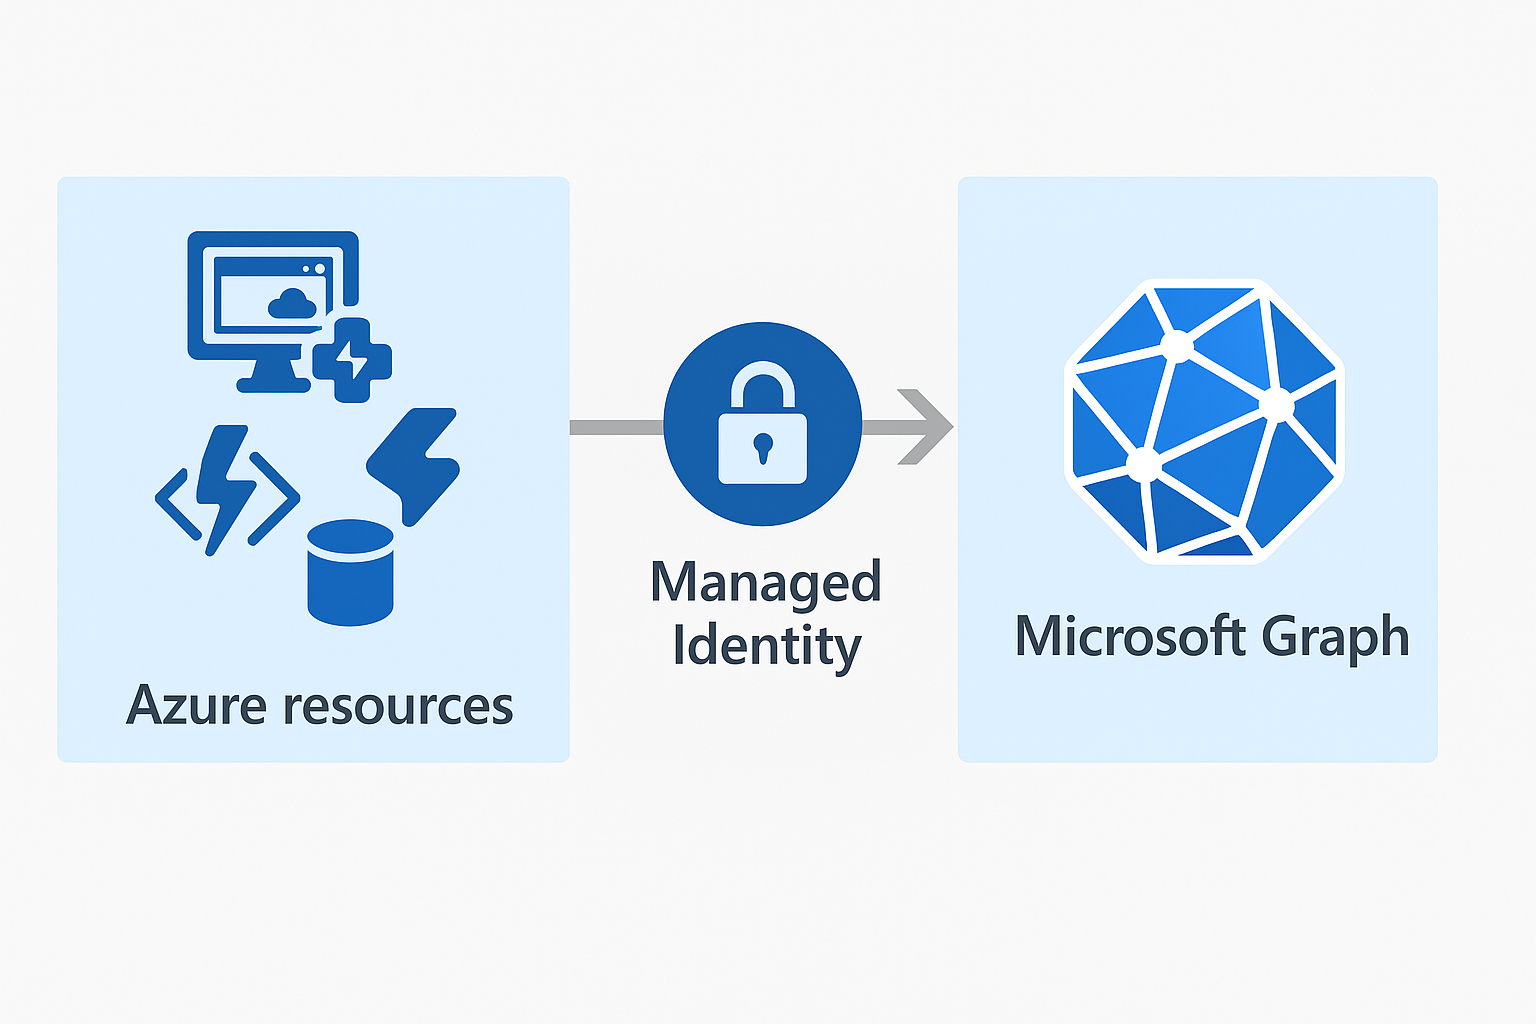
Many Azure resources support the configuration of managed identities which help you grant permissions to your resource(s). For instance, you need to grant your WebApp permissions to KeyVault to get Keys/Secrets.
But it’s also possible to grant this managed identity access to the Microsoft Graph API letting you manage Entra ID!
In my other blogs I’ve already shown how to create Azure Functions, add an identity, and give some basic permissions to Azure resources. In this blog, I’ll go even deeper and show you how to utilize the same Azure Function with the managed identity to grant access to the Azure Graph API. After this blog post, you will know how to level up your Azure Functions to automate your infrastructure even further!
Also, in this blog, you’ll find the ‘Deploy to Azure’ button deploying a basic Azure Function for you!
During this post, you’ll see this icon 🎬 which indicates that action is required so you get the full benefit out of this post.
And I’ve introduced the 📒 which indicates that the subsequent part explains the technical details in the context of this post.
What are managed identities?
Managed identities in Azure are a feature of Entra ID that provides automated identity management for all sorts of Azure services. They allow resources like (Virtual machines, apps, Functions, etc.) to authenticate securely without storing credentials in your code.
Managed identity eliminates the need for DevOps engineers and Developers to manage credentials for the resource(s) they manage when authenticating to cloud services. Azure manages the lifecycle of this identity for you. It creates, rotates, and deletes it as needed.
Types of Managed Identity
Currently, there are two types of Managed Identities known in Azure. These two types are:
- System-assigned managed identity
- User-assigned managed identity
The table below shows the differences
| System-Assigned | User-Assigned | |
| Scope | Single-Resource | Reusable across multiple resources (although best practice is to keep it with a single resource) |
| Lifecycle | Tied to the resource (when the resource is deleted, so will be the identity) | Managed independently (when the resource is deleted the identity and its permissions will still exist) |
| Number of per resource | One; Azure manages the identity of the resource in this case per unique resource | Multiple, but not advised as best practice |
| Management effort | Minimal (Azure manages most things for you, except for the assignment of permissions) | Manual as you are working with a one-to-many type of identity you need to manage much more of the identity than with a one-to-one model as the System-Assigned is. |
| Use case | Per-resource access needs. Like your app service needs to have access to a KeyVault | Shared across services. For instance, multiple apps need the same permission to get something out of a storage account (Again, not the best practice!) |
In the end, you will benefit from the Security benefits described below;
- No secrets or credentials to manage in your code
- Automatic rotation of secrets
- RBAC integration, to configure least privileged access
What is GRAPH?
Before bringing everything together let me also explain what GRAPH does so you get the full picture.
Microsoft Graph is Microsoft’s API endpoint for managing all Microsoft 365 services. It acts as the gateway to your organization’s data and configuration in the Microsoft cloud, including:
- Entra ID
- Outlook/Exchange Online
- Teams
- SharePoint
- Intune
- Users, Groups, Devices and more
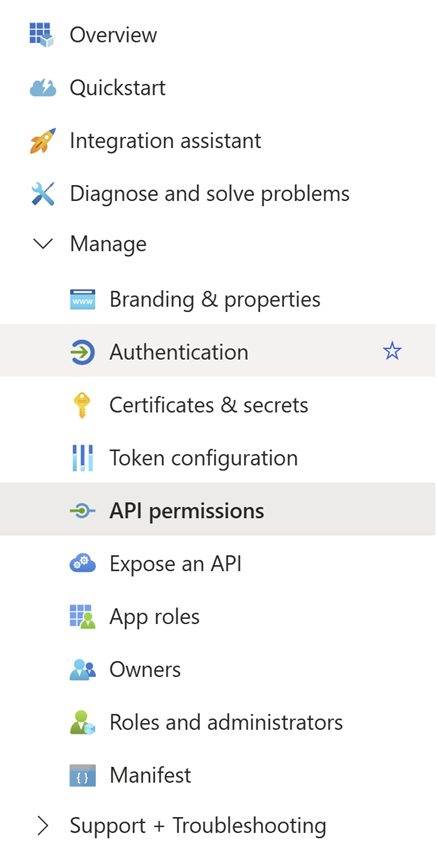
If you want to check all the functionalities which GRAPH has to offer you can check your own Azure Entra environment. Simply open one of your existing App registrations or create a basic one if you don’t have any.
Go to the “API permissions” and click “Add a permission” in the App registrations page
Then select “Microsoft Graph”
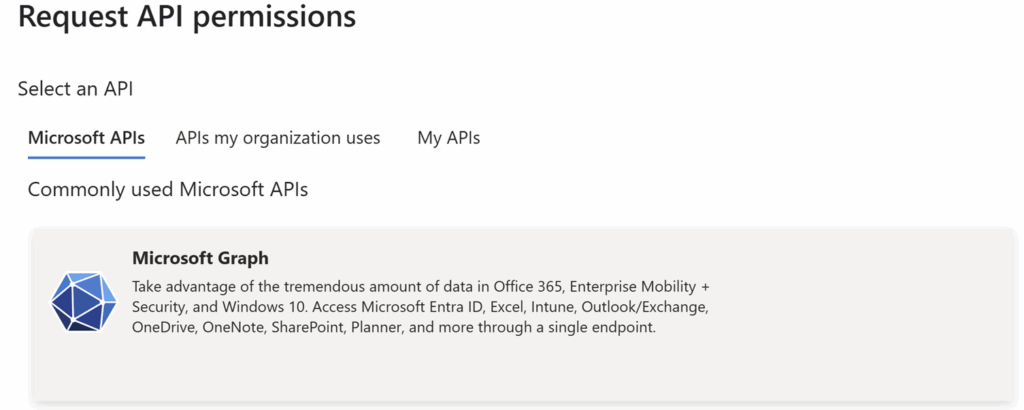
Choose “Application permissions”. You will see the full list of possible permissions you can grant. In this post I’ll stick with Users.Read.All but the possibilities are endless!
You can grant any permission from the list you want, to give your code even more functionality!
Time to deploy
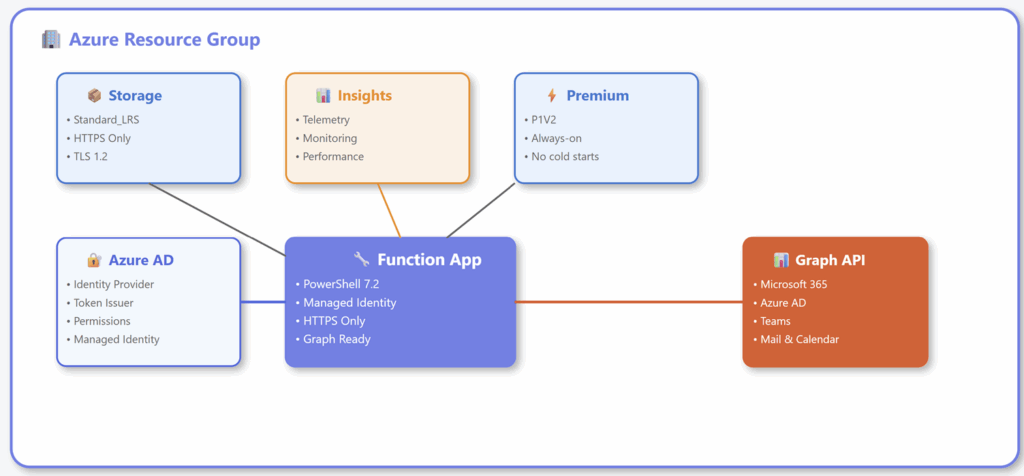
Before showing how you can grant Graph permissions to your identity we need infrastructure!
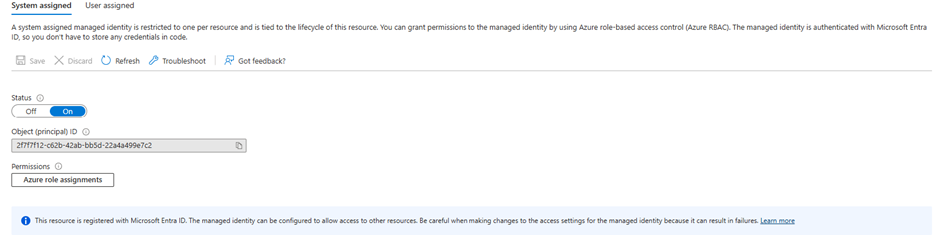
🎬 Deploy a default Azure function with PowerShell as runtime and enable a system managed identity on it
Or let me deploy it for you! 😉 click the button below to deploy everything you need to get started!
When you are done either deploying the resources yourself or using the automatic provisioning I’ve created for you, you should end up with a deployment as shown below.
Function Code
Below is the code for inserting your function.
using namespace System.Net

param($Request, $TriggerMetadata)

Write-Host "PowerShell HTTP trigger function with Managed Identity processed a request"

$resourceURI =  "https://graph.microsoft.com/"
$tokenAuthURI = $env:IDENTITY_ENDPOINT + "?resource=$resourceURI&api-version=2019-08-01"

write-host "Using token URI: $($tokenAuthURI)";

$headers = @{
 'X-IDENTITY-HEADER' = $env:IDENTITY_HEADER
}

$tokenResponse = Invoke-RestMethod -Method Get -Headers $headers -Uri $tokenAuthURI
$accessToken = $tokenResponse.access_token

write-host "Successfully obtained access token for Microsoft Graph!"
write-host "Token is: $($accessToken)"

$graphUri = "https://graph.microsoft.com/v1.0/users"

$graphHeaders = @{
    'Authorization' = "Bearer $accessToken"
    'Content-Type'  = 'application/json'
}

    $graphResponse = Invoke-RestMethod -Method Get -Uri $graphUri -Headers $graphHeaders

    Write-Host "Successfully retrieved users from Microsoft Graph"

    # Optional: log the first few user display names
    $graphResponse.value[0..2] | ForEach-Object {
        Write-Host "User: $($_.displayName) - $($_.userPrincipalName)"
    }

    $body = @{
        status = "success"
        message = "Retrieved users"
        users = $graphResponse.value[0..4]  # Only show a few for the response
    } | ConvertTo-Json -Depth 4
Push-OutputBinding -Name response -Value ([HttpResponseContext]@{
StatusCode = [System.Net.HttpStatusCode]::OK
Body = $body
})
Testing
Go to the Azure function and test it! You will see the output as shown below:
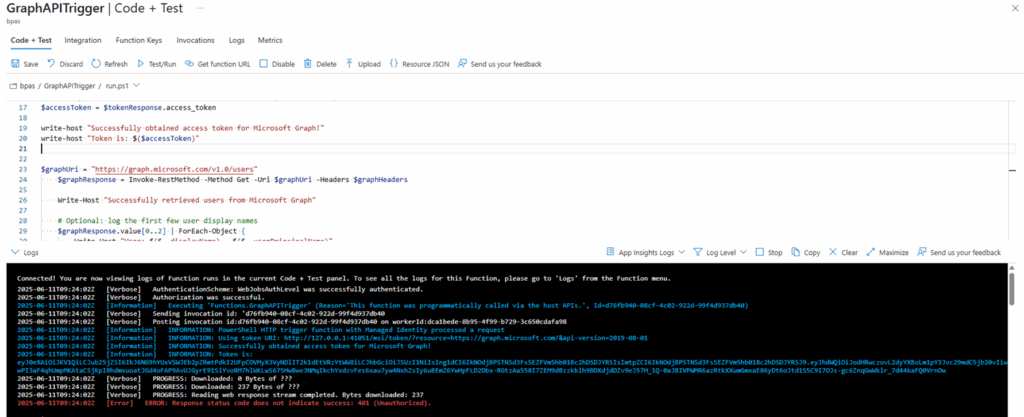
It fails! Why? This is because we haven’t yet assigned the correct permissions to the managed identity to query Graph and get all users.
In the code you can find the operation sent to Graph:
$graphUri = “https://graph.microsoft.com/v1.0/users”
We basically request Graph “Give us all users from the Entra ID directory service”. And as the identity we are using to execute this operation doesn’t have the correct permissions, Entra responds with “No, can’t do because you don’t have the appropriate permissions”.
Let’s change that!
🎬 Follow the steps below to configure the correct permissions for your managed identity.
- Copy the managed identity object ID from the managed identity configuration on the Azure Function.
- Open a cloud shell and run the commands below and note the output
- Get the Microsoft Graph Principal ID: az ad sp list –filter “displayName eq ‘Microsoft Graph'” –query “[0].id” –output tsv
- Get the Microsoft Graph App Role ID for “User.Read.All”: az ad sp show –id “00000003-0000-0000-c000-000000000000” –query “appRoles[?value==’User.Read.All’ && allowedMemberTypes[0]==’Application’].id” –output tsv
- Now we have all the required values we can assign the correct permissions to the managed identity.
Execute the command below to grant the permissions:
az rest --method post `

  --uri "https://graph.microsoft.com/v1.0/servicePrincipals/<STEP1 OUTPUT>/appRoleAssignments" `

  --headers 'Content-Type=application/json' `

  --body '{

    "principalId": "<FUNCTION MANAGED IDENTITY OBJECT NAME>",

    "resourceId": "<STEP 1 OUTPUT>",

    "appRoleId": "<STEP 2 OUTPUT>"

}'
Now if we run the function again, we will see the output below:
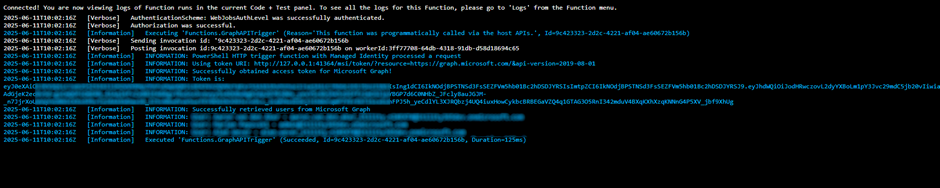
💡 Sometimes it might take a couple of minutes, or you need to restart your function to make sure it has the latest token and the correct permissions.
Summary
In this post, we took our Azure Function skills up a notch by combining Managed Identity with Microsoft Graph API access. You now know how to let your Azure Function securely talk to Microsoft Graph (yes, without shoving secrets into your code > big win 🎉).
We started with the basics: what managed identities are and why they’re amazing (hint: no password headaches, auto-rotation, and super secure!). Then we introduced the real star of the show – Microsoft Graph – the powerhouse API behind everything Entra, M365, Teams, and more.
From there, it was action time: you learned how to deploy a function with managed identity, grab a token, and make your first real Graph call to list users. Of course, we hit that permission wall – because security matters – but no worries! We walked through the steps to assign User.Read.All permissions to our managed identity using Azure CLI.
Now your function is not only smart, it’s also connected to the Microsoft Graph universe 🚀.
Hope this helped you unlock a new level of automation and make your cloud life a little bit cooler. Keep building, keep learning, and as always, have fun doing it! 😎