
Introduction
In the previous blog post: https://bartpasmans.tech/start-scripting-like-a-pro-7-setting-up-a-custom-graphql-api-and-consume-with-powershell/
I’ve shown you how to set up a GraphQL API (for the loyal followers of this blog series 😉 with the user management system). In this blog post, I want to show you how to achieve the same goal—“Setting up an API and consuming it with PowerShell”—by utilizing Microsoft Azure Functions.
For those who haven’t seen the previous blog post, let me summarize what we did and what we will be doing next.
We want to centralize our code, so that the code is not longer only available to us (the developers), but also to others using generic ways of communicating (like HTTP requests) and dealing with the response. This way, our business logic is available to everyone within our organization(s) that can benefit from it!
Again, within this blog I’ll identify the steps where your input is required with: 🎬
Have fun!
Azure functions explained
Azure Functions is a PaaS service (and as the name describes, it’s available on Azure). They help you create a serverless solution that allows you to host your code as a service on the Azure platform.
This way, you can make—for instance—APIs or business logic at a centralized location and available over TCP/IP connections. Very similar to the previous blog (URL mentioned at the beginning).
In this blog post, I’ll be focusing on how to work with Azure Functions using an HTTP Request / HTTP Response model. But there are many more ways of consuming Azure Functions. For instance, a very interesting one is reacting to events by implementing event-driven architecture! That one will be for a future post 😉
What are we going to build?
A picture is worth a thousand words, so I created the diagram below to show what we’ll be building in this blog post and what the consumption path will look like.
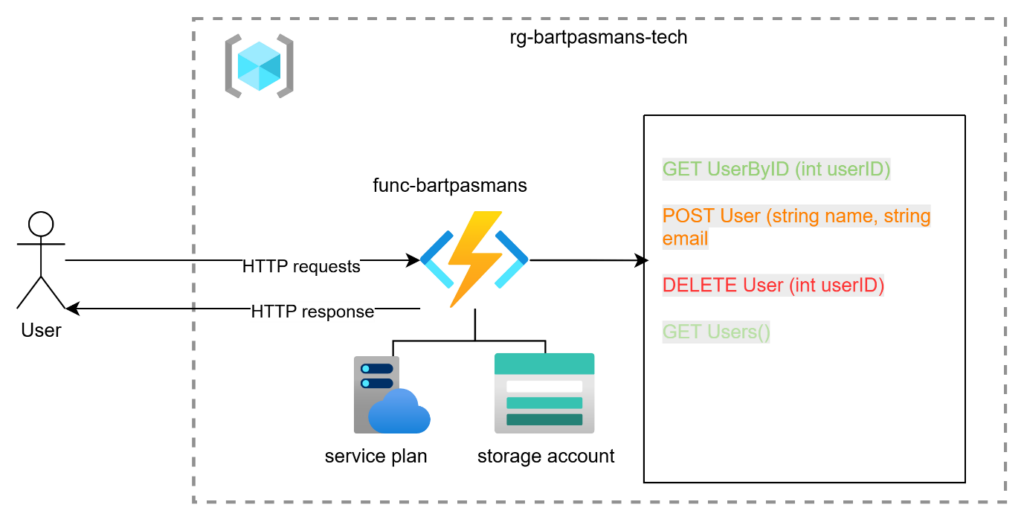
We will not implement SQL or any other persistent data storage during this blog. We will Stick with local temporary storage for now by implementing a JSON file further down this blog post. For Database related topics I will include a dedicated post in the future.
Prerequisites
Before starting we need to have a certain set of tools available before we can start.
🎬 Install the tools below to setup your environment
- https://code.visualstudio.com/
- https://learn.microsoft.com/en-us/azure/azure-functions/functions-run-local?tabs=windows%2Cisolated-process%2Cnode-v4%2Cpython-v2%2Chttp-trigger%2Ccontainer-apps&pivots=programming-language-powershell
- Install in visual studio code the extensions for Azure functions
- Make sure your visual studio is configured and setup for your account (including the contributor permissions in Azure)
- Resource group in Azure
I’ll assume you know how to set up your environment for our first Azure Function to land. If you run into any struggles, please let me know so I can add the required extra steps to the post.
Configuring function
In this part of the post, I’ll show you how to setup the Azure function. Although it’s a pretty straightforward process there are some details to take into account to make sure our code runs in the end.
🎬 Go to your resource group in Azure and create a new function by following the steps below.
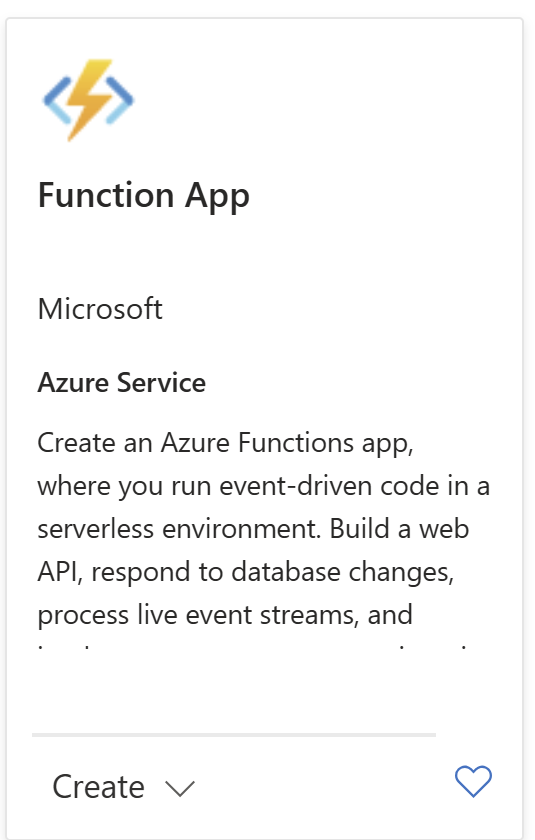
- Find the Azure functions in the Azure marketplace
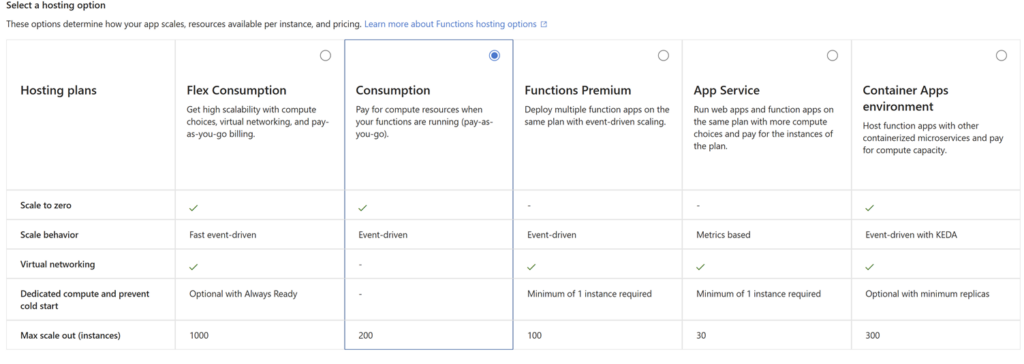
- For the Tier we stick with hosting plan ‘consumption’ as it’s for training only. 💡 Make sure that you choose the appropriate plan for your workload when going to production
- Configure the app so it has the right setting for PowerShell and the region configured
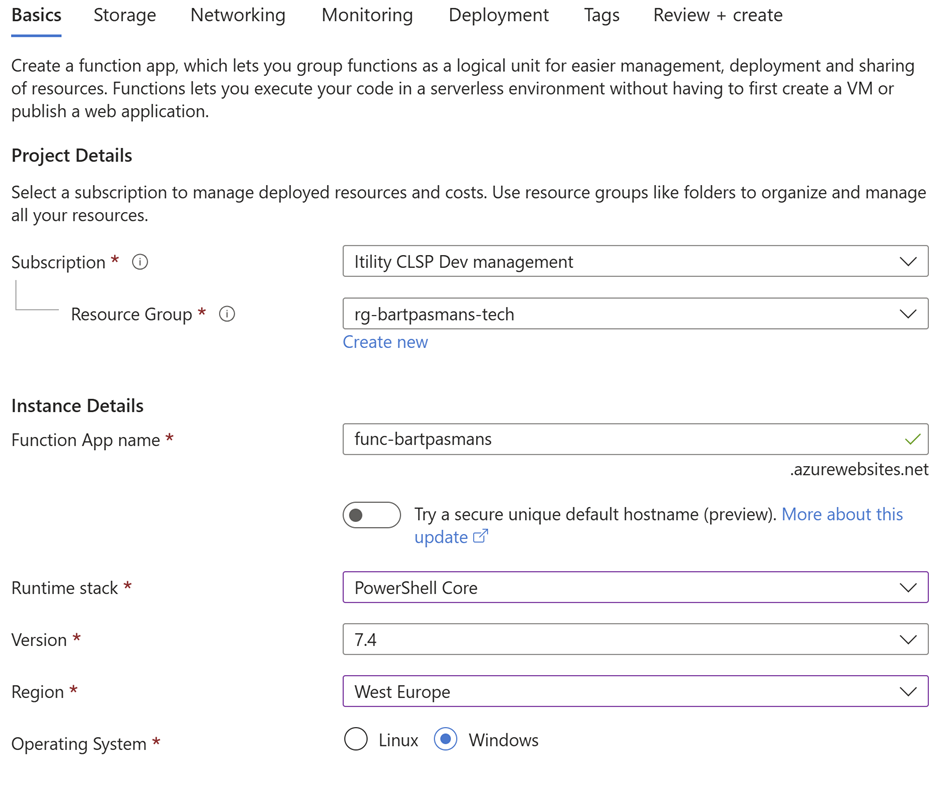
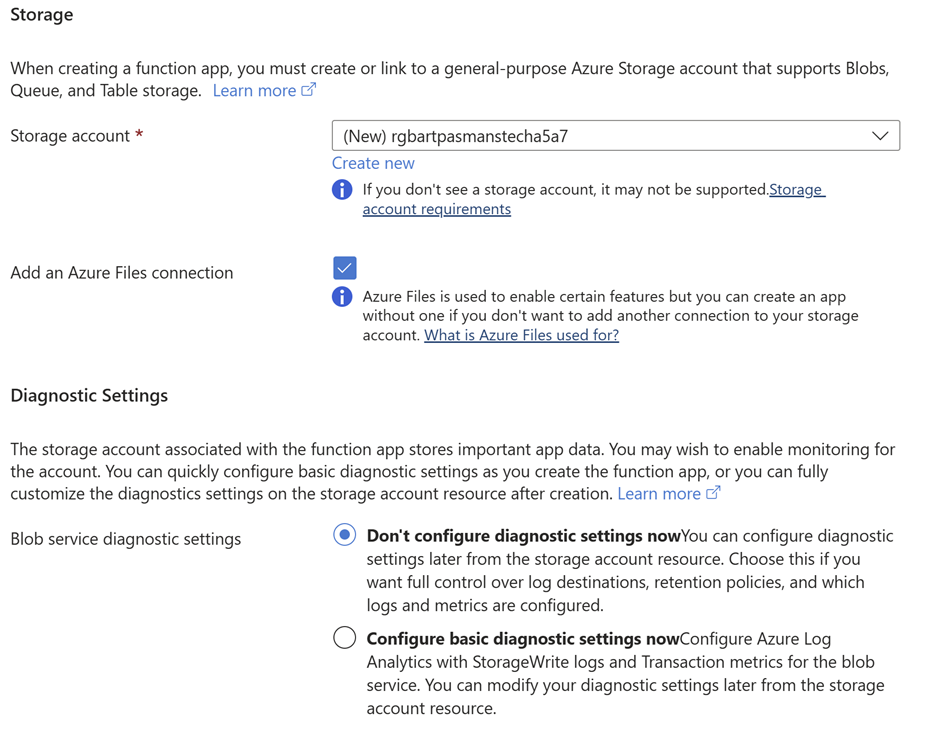
- For the storage configure as described below. Storage is required as we need a place to store the actual function itself.
- We leave Networking to default
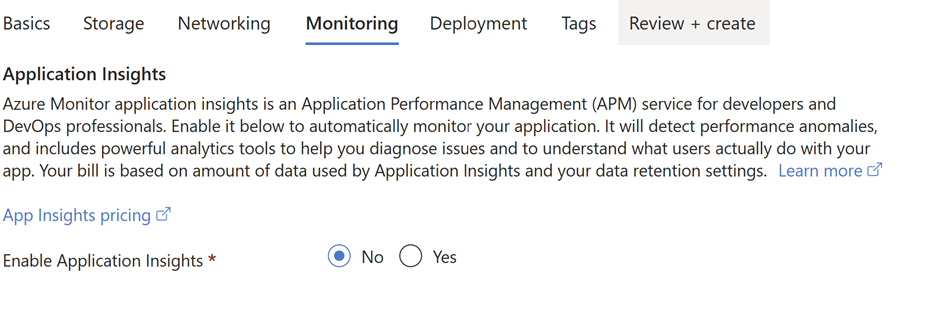
- And disable application insights
- We won’t be using Continuous deployment for now and no tags will be applied. Keep these by default not configured and finish the deployment.
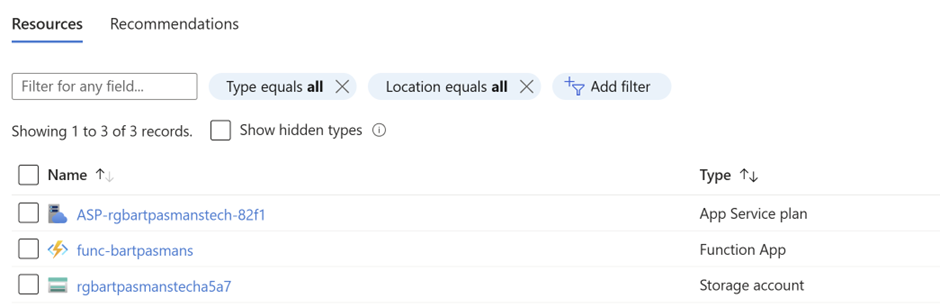
When you completed the steps above you should have something like below
First function
Now that we have the infrastructure available it’s time to configure the first Azure function. For now we will be working mostly in Visual Studio Code.
Let’s get started!
🎬 Follow the steps below to set up the function
- Go to the extension for Azure and create a new function project in the workspace directory in Visual Studio Code
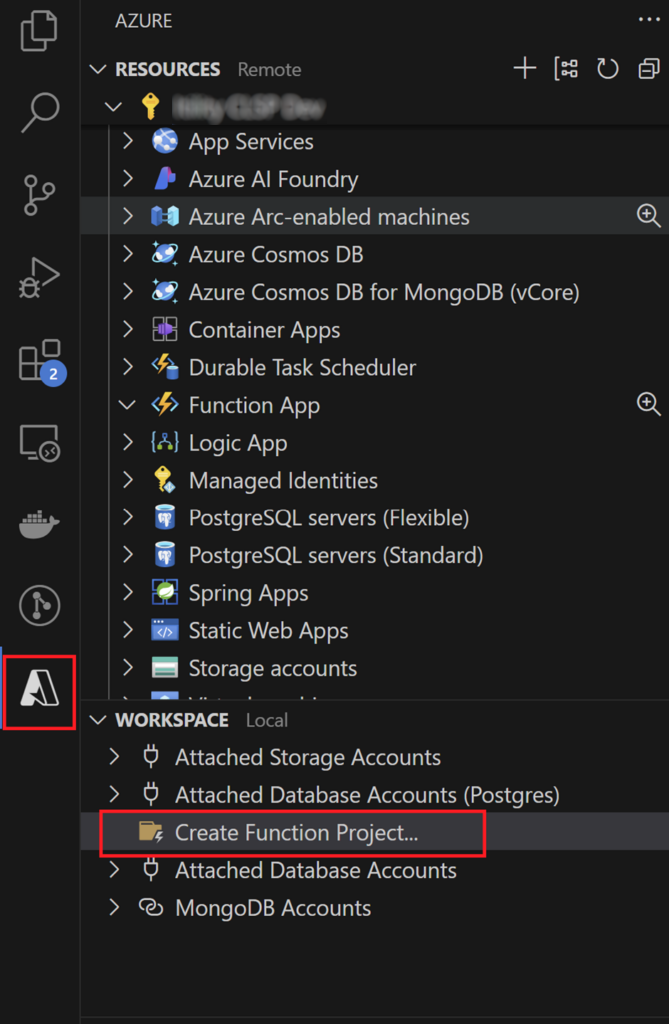
- 💡 Use PowerShell as the type of function as we also configured PowerShell as type for the infrastructure.
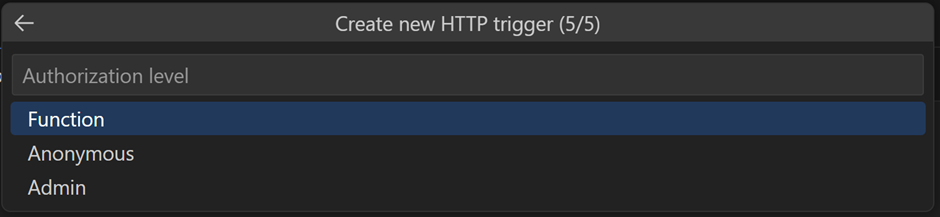
- Use “HTTP Trigger” when asked to provide how the function should be triggered

- Authorization we will leave to the function
When everything is deployed switch over to the solution overview to see what has been created.
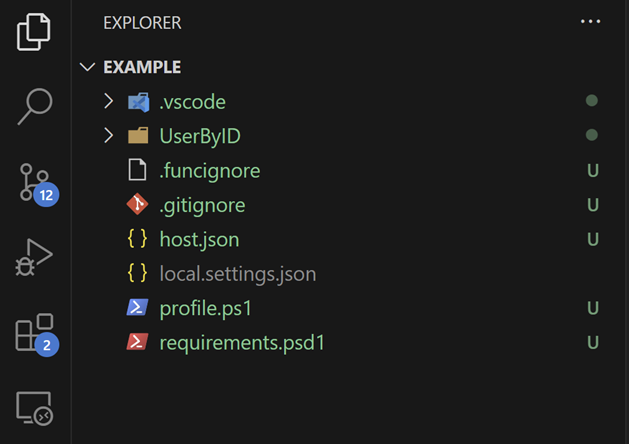
Explanation:
UserByID: This is the function we deployed. It contains the logic for this specific function.
Host.json: Contains the properties required for the running host to understand how to run the Azure Function in the end.
Local.settings.json: Contains the configuration for running the Azure Function locally. 😉 Yes! We can run them locally using the core tools, so we don’t constantly have to deploy the code to Azure just to validate it.
Profile.ps1: Contains everything that will be executed as soon as the Azure Function starts. Maybe you want to inform other functions or set up authentication/authorization. Basically, everything before actually serving the code.
Requirements.psd1: If you checked the previous blog post about creating modules, this should sound familiar. If not, feel free to check it out here: https://bartpasmans.tech/start-scripting-like-a-pro-4/ — basically, this is where we specify which modules our function needs to operate.
We won’t be focusing on modules in this post. If you’re interested, please let me know and I’ll create a dedicated post on setting up custom modules and consuming them in Azure Functions.
To help you speed up the development process, I’ve created the user management class for this blog. You can find it below.
🎬 Make sure you place the code below in the usermanagement.ps1 file and store it in the root of the Azure Function.
class User {
    [int]$Id;

    [string]$Name

    [string]$Email

    [int]$Age

    User([int]$id, [string]$name, [string]$email, [int]$age) {
        $this.Id = $id;
        $this.Name = $name
        $this.Email = $email
        $this.Age = $age
    }
}

class UserManagement {

    [string]$JsonFilePath

    UserManagement() {
        # Set path to users.json file in the same directory as this script
        $this.JsonFilePath = Join-Path -Path $PSScriptRoot -ChildPath "users.json"

        # Check if the file exists, create it if it doesn't
        if (-not (Test-Path -Path $this.JsonFilePath)) {
            $initialUsers = @(
                [User]::new(1, "Jane Doe", "jane.doe@bartpasmans.tech", 30),
                [User]::new(2, "Joe Smith", "joe.smith@bartpasmans.tech", 25)
            ) | ConvertTo-Json -Depth 4

            Set-Content -Path $this.JsonFilePath -Value $initialUsers
        }
    }

    [void]AddUser([string]$name, [string]$email, [int]$age) {
        # Read current users from the JSON file
        $users = $this.GetUsers()

        # Determine the next user ID
        $maxId = ($users | Measure-Object -Property Id -Maximum).Maximum
        $nextId = if ($maxId) { $maxId + 1 } else { 1 }

        # Create new user
        $newUser = [User]::new($nextId, $name, $email, $age)

        # Add to the list and save back to the JSON file
        $users += $newUser
        $users | ConvertTo-Json -Depth 4 | Set-Content -Path $this.JsonFilePath
    }

    [void]RemoveUser([string]$name) {
        # Read current users from the JSON file
        $users = $this.GetUsers()

        # Find user to remove
        $updatedUsers = $users | Where-Object { $_.Name -ne $name }

        if ($users.Count -ne $updatedUsers.Count) {
            # Save updated users back to the JSON file
            $updatedUsers | ConvertTo-Json -Depth 4 | Set-Content -Path $this.JsonFilePath
        } else {
            Write-Host "User not found."
        }
    }

    [System.Collections.Generic.List[User]]GetUsers() {
        # Read users from the JSON file
        if (Test-Path -Path $this.JsonFilePath) {
            $userJson = Get-Content -Path $this.JsonFilePath -Raw

            if ($userJson) {
                $userObjects = $userJson | ConvertFrom-Json
                $users = [System.Collections.Generic.List[User]]::new()

                foreach ($user in $userObjects) {
                    $userInstance = [User]::new($user.Id, $user.Name, $user.Email, $user.Age)
                    $users.Add($userInstance)
                }

                return $users
            }
        }

        # Return empty list if file doesn't exist or is empty
        return [System.Collections.Generic.List[User]]::new()
    }

    [User]GetUserById([int]$id) {
        # Read users from the JSON file
        $users = $this.GetUsers()

        # Find user by ID
        $user = $users | Where-Object { $_.Id -eq $id }

        if ($user) {
            return $user
        } else {
            Write-Host "User not found."
            return $null
        }
    }
}
🎬 Also create file called ‘users.json’ and store it at the same level as the user management file. Give it the content as described below.
[
  {
    "Id": 1,
    "Name": "Jane Doe",
    "Email": "jane.doe@bartpasmans.tech",
    "Age": 30
  },
  {
    "Id": 2,
    "Name": "Joe Smith",
    "Email": "joe.smith@bartpasmans.tech",
    "Age": 25
  }
]
Modify the function
Before we can continue running the function, we need to modify the code. Since we now have the logic for user management in the UserManagement class, we need to make sure the function can access this logic. To do that, we need to update the run.ps1 file so it looks like the example below.
using namespace System.Net
# Input bindings are passed in via param block.
param($Request, $TriggerMetadata)
# Import the user management class
$scriptPath = Join-Path -Path $PSScriptRoot -ChildPath "..\usermanagement.ps1"
. $scriptPath
# Create an instance of UserManagement
$userManagement = [UserManagement]::new()
# Get the user ID from the query parameter or request body
$userId = $Request.Query.Id
if (-not $userId) {
$userId = $Request.Body.Id
}
if ($userId) {
# Try to convert the ID to an integer
try {
$userIdInt = [int]$userId
$user = $userManagement.GetUserById($userIdInt)
if ($user) {
$body = $user | ConvertTo-Json
$statusCode = [HttpStatusCode]::OK
} else {
$body = "User with ID $userId not found."
$statusCode = [HttpStatusCode]::NotFound
}
} catch {
$body = "Invalid user ID format"
$statusCode = [HttpStatusCode]::BadRequest
}
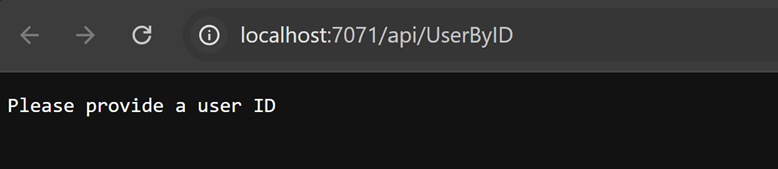
} else {
$body = "Please provide a user ID"
$statusCode = [HttpStatusCode]::BadRequest
}
# Associate values to output bindings by calling 'Push-OutputBinding'.
Push-OutputBinding -Name Response -Value ([HttpResponseContext]@{
StatusCode = $statusCode
Body = $body
Headers = @{'Content-Type' = 'application/json'}
})Explanation
The code now checks for input from the query string—which is basically the URL with parameters in the address bar or in the request of the HTTP call. It looks for a parameter called Id. If it can’t find this parameter in the query string, it will check the body to see if it’s there. If no value is found, a BadRequest is returned with the message: “Please provide a user ID.”
Let’s make those calls!
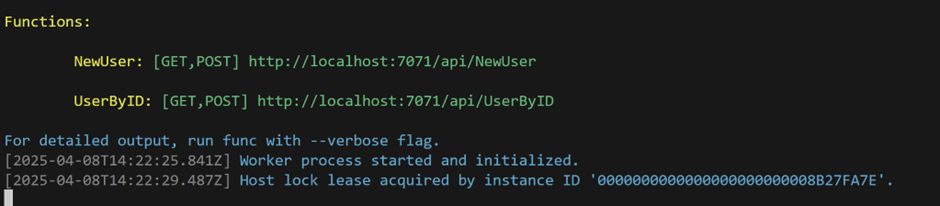
Now it’s time for some interaction with the Azure function we’ve created. Let’s start everything up by pressing F5 in Visual Studio code and you should see some output like below:
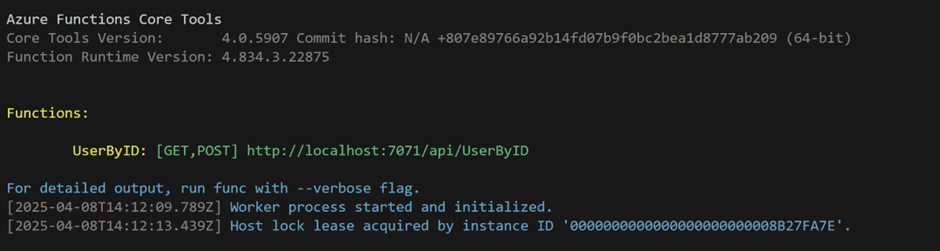
🎬 You can see the UserByID function in the output with the URL next to it. Copy and paste that URL in the browser and see what happens!
You should see something like below
Now let’s supply a valid parameter in the query and check again!
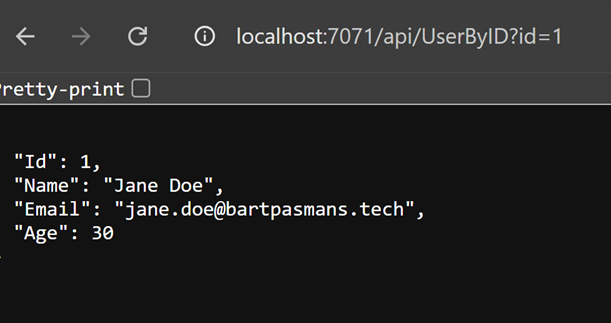
Success! The user has been found by the ID provided to the Azure Function.
Sending Data
We also want to send data to our Azure function of course. This is mostly done by utilizing a POST request. For this we will create a new Azure Function.
🎬 Create a new HTTP triggered function in the current project and provide it with a logical name like ‘NewUser’. Make sure it has the code as described below.
using namespace System.Net

# Input bindings are passed in via param block.
param($Request, $TriggerMetadata)

# Import the user management class
$scriptPath = Join-Path -Path $PSScriptRoot -ChildPath "..\usermanagement.ps1"
. $scriptPath

# Create an instance of UserManagement
$userManagement = [UserManagement]::new()

try {
    # Parse the request body
    $body = $Request.Body

    # Check if required fields are present
    if ($body.Name -and $body.Email -and $body.Age) {
        # Add the new user
        $userManagement.AddUser($body.Name, $body.Email, [int]$body.Age)

        # Return the newly created user
        $newUsers = $userManagement.GetUsers()
        $newUser = $newUsers | Select-Object -Last 1

        $responseBody = $newUser | ConvertTo-Json
        $statusCode = [HttpStatusCode]::Created
    } else {
        $responseBody = "Missing required fields. Please provide Name, Email, and Age."
        $statusCode = [HttpStatusCode]::BadRequest
    }
} catch {
    $responseBody = "Error creating user: $($_.Exception.Message)"
    $statusCode = [HttpStatusCode]::InternalServerError
}

# Associate values to output bindings by calling 'Push-OutputBinding'.
Push-OutputBinding -Name Response -Value ([HttpResponseContext]@{
    StatusCode = $statusCode
    Body = $responseBody
    Headers = @{'Content-Type' = 'application/json'}
})
Now, let’s make a request to this new function. For that we will be utilizing PowerShell as well.
🎬 Copy the URL from the running function for creating a new user. You can find it as soon as you start the function locally again in the output
Now open a new PowerShell session with the editor prefer. For the example I’ll show you how to do it by utilizing PowerShell ISE.
🎬 Run the code below from a PowerShell terminal:
$uri = "http://localhost:7071/api/NewUser";
$body = @{
    "Name" = "Bart Pasmans"
    "Email" = "info@bartpasmans.tech"
    "Age" = "35"
} | ConvertTo-Json

$response = invoke-restmethod -Uri $uri -Method Post -Body $body -ContentType "application/json"
If you now run the first function again to get a user with a specific ID and use the next follow-up ID which is 3 we should get back the new user.
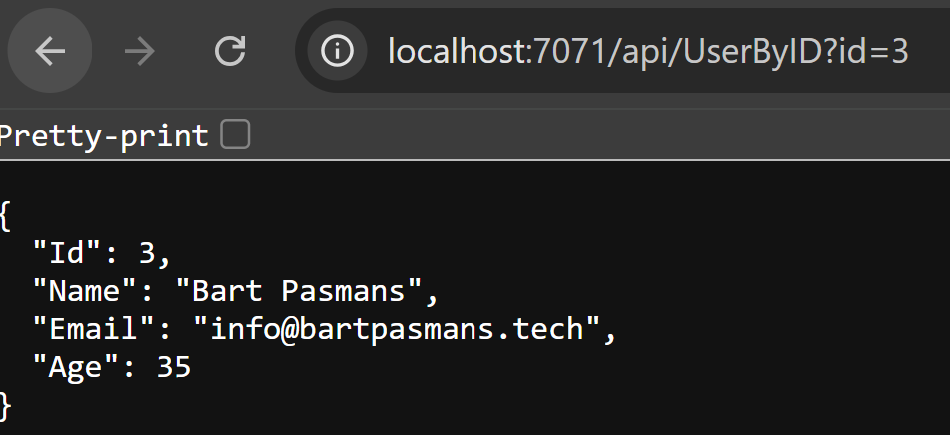
💡 Please note that adding the users to the JSON file is not persistent storage. As soon as the Azure Function restarts there is no guarantee that the data will be there.
🎬 Now with the provided examples try to implement the remaining functions for deleting and getting all existing users.
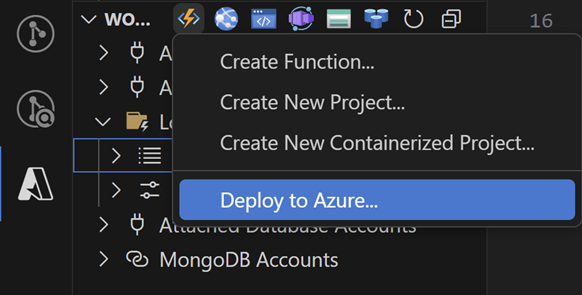
Deploy to Azure
🎬 Now we are ready to deploy our brand new function to Azure. Let’s go to the Azure extension and click ‘deploy to function’
Follow the prompt and select when requested the correct subscription containing your function.
When deployed you can validate the Azure Function in the portal. You should see the functions we’ve created there as well now!

Now let’s get the public endpoint of the consumption and consume it!
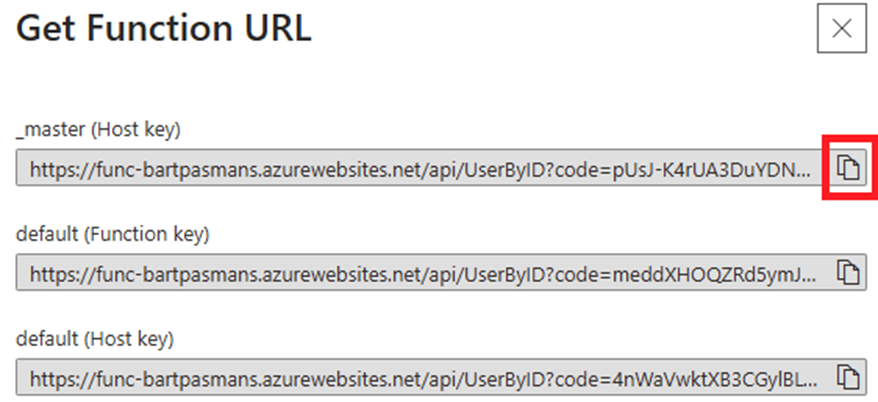
🎬 Find and click the ‘UserByID’ function and hit ‘Get function URL’

🎬 Now make sure you copy the master key
🎬 Enter the URL in either the browser or directly by a request through ‘Invoke-RestMethod’. By the way; don’t forget the provision the userid 😉
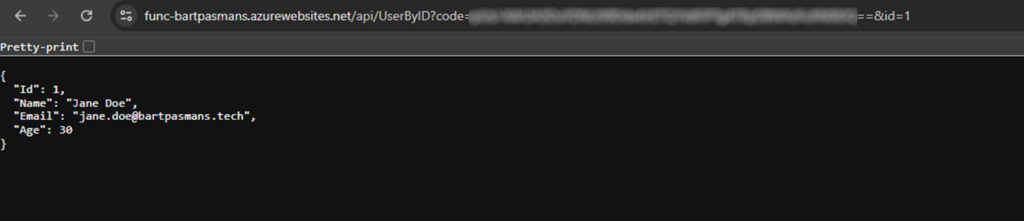
💡 Oh! Don’t forget that the first query parameter which is identified by the ‘?’ is already taken by the function security code. Our ID now needs to be supplied with ‘&id=1’.
So what’s next?
Now you know how to deploy a function and how to make your code available in a centralized way you can think of opportunities on how to implement this. For instance you could connect the Azure function to your own network and automate things. Some suggestions might be:
- Create an automated inventory of your assets
- Decommissioning or commissioning of new AD users
- Self healing workbooks
- ADDS management
- Email/M365 management
And way more!
⚠️ Just be aware that your function by default is public! Don’t put sensitive logic/data behind it. If you do need this, implement private endpoints. (might even be good for a new blog post! 😉, stay tuned)
Summary
In this blog post, we embarked on an exciting journey to explore Azure Functions as a powerful alternative to our previous GraphQL API implementation. We started by understanding what Azure Functions are – a PaaS serverless solution that allows us to host our code as a service on the Azure platform, making our business logic accessible to others through HTTP requests. The journey began by setting up our development environment, ensuring we had all the necessary tools like Visual Studio Code and Azure Functions Core Tools. We then created our Azure Function infrastructure in Azure, carefully configuring it with PowerShell as our runtime and setting up the appropriate storage account.
Our focus was on building a user management system, similar to our previous implementation, but this time using Azure Functions. We created a robust UserManagement class that handles user operations and stores data in a JSON file.
We explored how to make HTTP requests to our functions, both locally during development and after deployment to Azure. Through practical examples, we demonstrated how to retrieve users by ID and create new users using PowerShell’s Invoke-RestMethod cmdlet.
The post also touched on important considerations like security (using function keys) and the temporary nature of our JSON storage solution. We wrapped up with potential real-world applications of Azure Functions, from asset inventory management to AD user management and M365 operations.
This journey showed us how Azure Functions can serve as a powerful platform for centralizing business logic and making it accessible across an organization, while maintaining the flexibility and ease of development that PowerShell developers love.
If you have any questions feel free to reach out to me! 😉