
Azure App Services by default are open to the public, allowing external connections to your trusted app. Sometimes setting the status of your App Service from public to ‘private’ is not something you want. But you do want to limit control over who is accessing your App Service.
When whitelisting of IP addresses is not an option, and self-developing an authentication solution doesn’t work for you, you can use the Azure App Service Pre-Authentication option!
In my other blogs I’ve already shown how to create Azure Functions, add an identity, and give some basic permissions to Azure resources. In this blog post, we’ll dive into authentication using App Services!
Also, in this blog, you’ll find the ‘Deploy to Azure’ button deploying a basic Azure Function for you!
During this post, you’ll see this icon 🎬 which indicates that action is required so you get the full benefit out of this post.
And I’ve introduced the 📒 again in this post which indicates that the subsequent part explains the technical details in the context of this post.
What is App Service Authentication?
Azure App Service Authentication is a feature of Azure on App Services that provides built-in authentication and authorization capabilities for Azure App Services, API or backends. It’s a feature that is processed on request on the Azure App Service.
The image below shows where and how this works
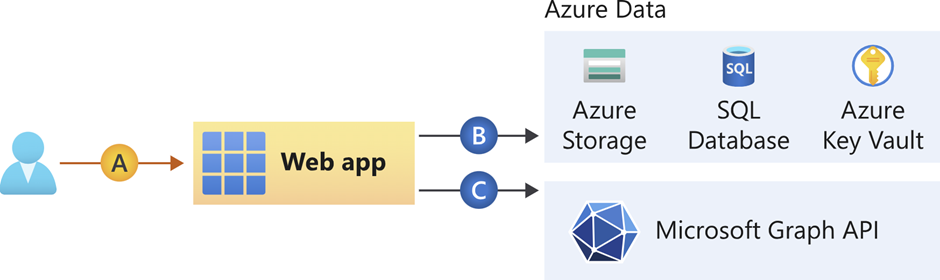
A = where the user needs to be authenticated to the webapp
B = where the app with the authenticated user can request additional service in Azure (or towards a custom service like an API)
Some advantages of using the App Service authentication are:
✅ No code changes required for authentication (configuration only)
✅ Works for web apps and APIs
✅ Supports JWT token validation
✅ Enforces identity control towards your web app
When to use
Some situations in which you can use the service are;
✅ Internal Apps without private networking (Dashboards/APIs/intranet)
✅ Extra level of security to check the identity of users accessing your web app
✅ Restrict web app access to a set of user(s) when networking restrictions don’t work for this purpose
💡 Remember that this level of authentication takes place before any traffic forwarding to your web app is made. Which means that the authentication is done on the Azure platform instead of in the app itself. Although this brings some easy authentication, it also has its limits! Check your case to identify if App Service authentication fits your needs!
Prepare the deployment
Although later in this post, you can use the ‘Let me deploy it for you’ functionality, we do need some configuration in advance before we can continue. One of these steps is to deploy in your Entra ID two Azure App Registrations, which we can use to communicate with Entra for user validation/authentication.
🎬 Create an Azure app registration in Entra ID for a WebApp (no settings required for now, just the app registration), and store the ClientID somewhere you’ll need it!
🎬 Create an Azure app registration in Entra ID for an API (no settings required for now, just the app registration) and store the ClientID somewhere you’ll need it!
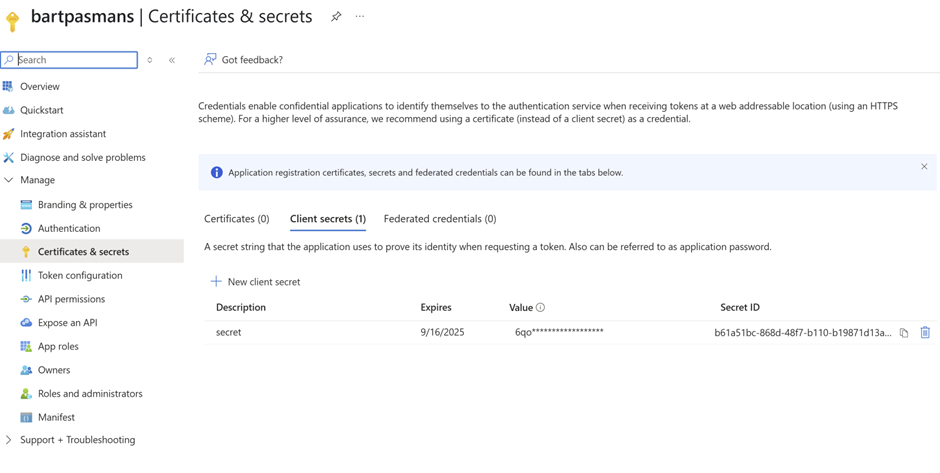
⚠️ Also, add a secret to both the app registrations! (This is important for the Authentication to work!)
You should end up with what I have below for the Web App and one for the API
Time to deploy
Before showing how all this works, we need to deploy some resources!
🎬 Deploy the resources below:
- App Service Plan
- App Service
- You can find the code of the webapp later in this blog post for example reference (deploy this code to your webapp)
Or let me deploy it for you! 😉 Click the button below to deploy everything you need to get started!
Enter the parameters required during automated deployment.
⚠️ Remember the ClientID from the steps before? We need to enter that during the deployment, so the Azure Web App and API know what details it needs to use for authentication.
When you are done either deploying the resources yourself or using the automatic provisioning I’ve created for you, you should end up with a deployment as shown below.
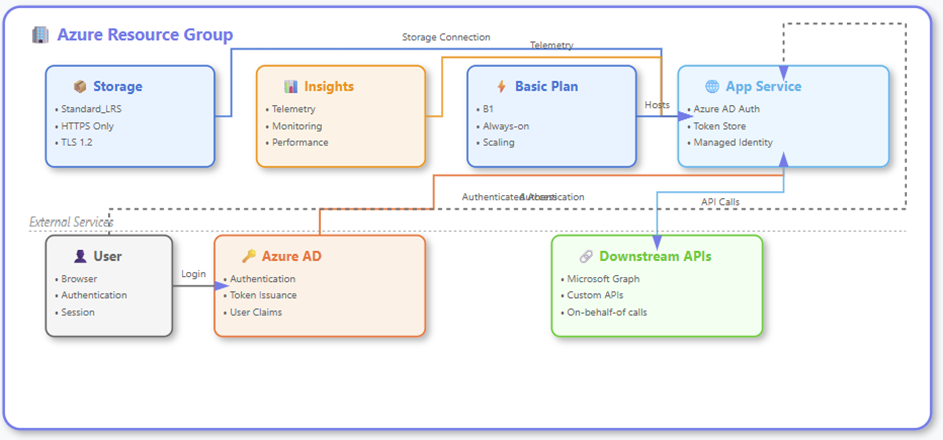
Although I can assist you in deploying the infrastructure for you, the web app and API need to be deployed by yourself for now 😉
In the training repository, I’ve made some zip files that can be used for zip deployment to your resource(s).
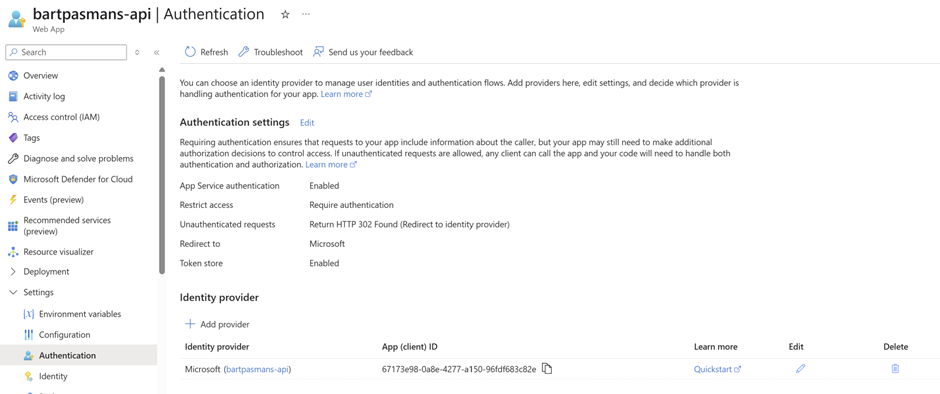
📒 If you’ve chosen to deploy things manually you need to add an authentication provider of Microsoft towards the API and the Web App. Example of this configuration is shown in the image below
WebApp ZIP:
Download Web App from GitHubAPI Zip:
Download API ZIP from GitHub🎬 Download the ZIP files from the repository and run the commands below to deploy the resources
- Run the command locally to deploy the Web App
az webapp deploy –resource-group [resourcegroupname] –name [webappname]–src-path api.zip –type zip
- Run the command locally to deploy the API
az webapp deploy –resource-group [resourcegroupname] –name [apiname]–src-path api.zip –type zip Now both resources are deployed 😊
Modify the app registration
When the deployment of the Web App is completed, it’s time to modify the App Registration so it fits the authentication platform we want to support.
🎬Modify the App Registration according to the steps below for the Web App and for the API!
- Add a web authentication platform
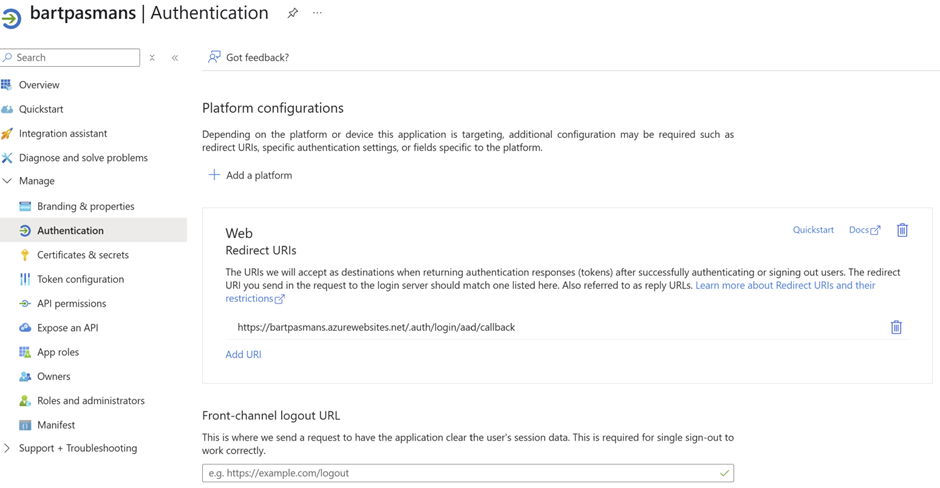
- Add the URL of your Web App here. The full path should be like: https://your-app-name.azurewebsites.net/.auth/login/aad/callback
- Set the token support to ID Tokens for both app registrations in Entra
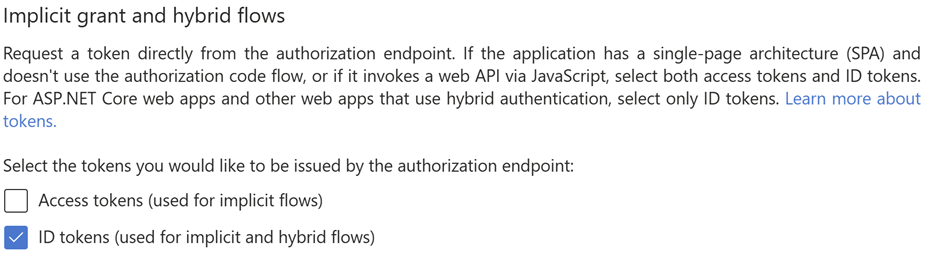
- Save your settings, and we are good to continue!
Time for testing
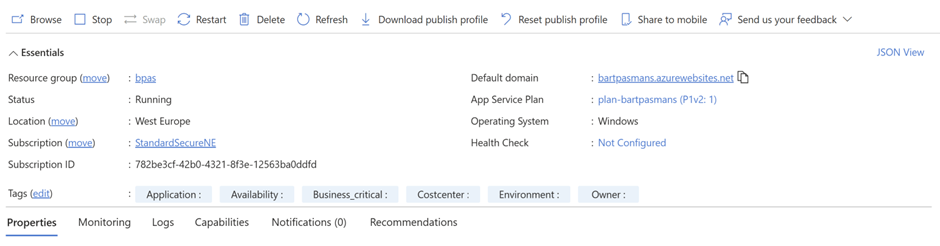
Go to the App Service you just deployed and find the domain name in the Essentials screen
If you now visit the App, you will get the Microsoft Authentication window
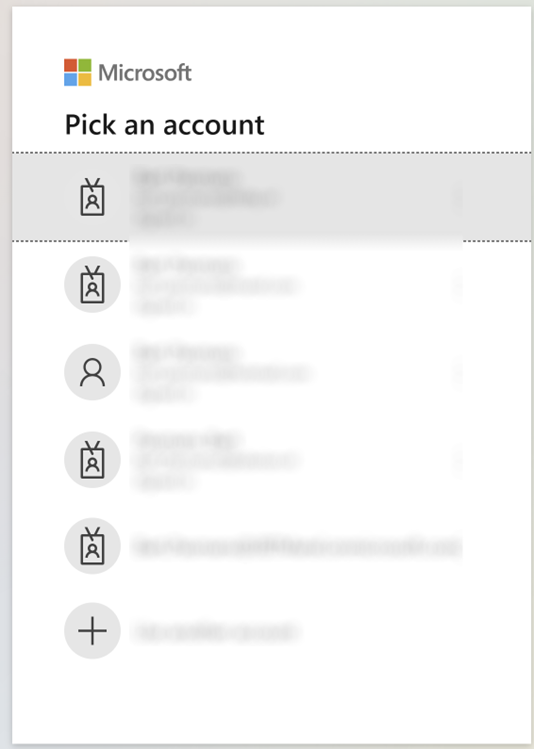
Choose the account or enter the account details that belong to the same tenant as where you deployed your app.
When you are logged in, you are greeted by our new app! 😊
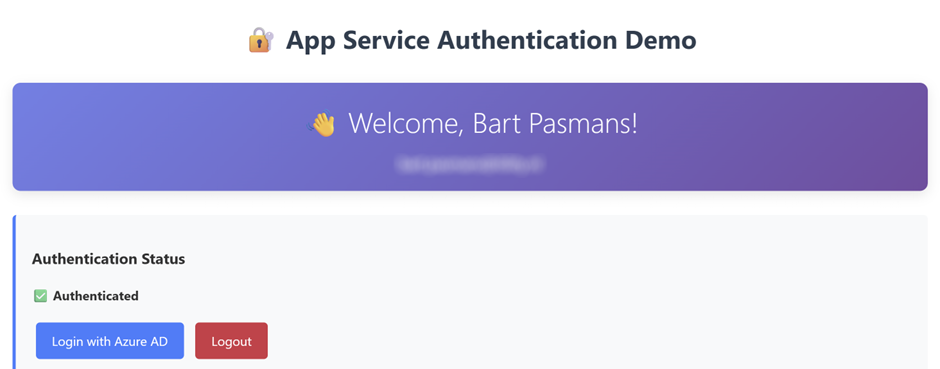
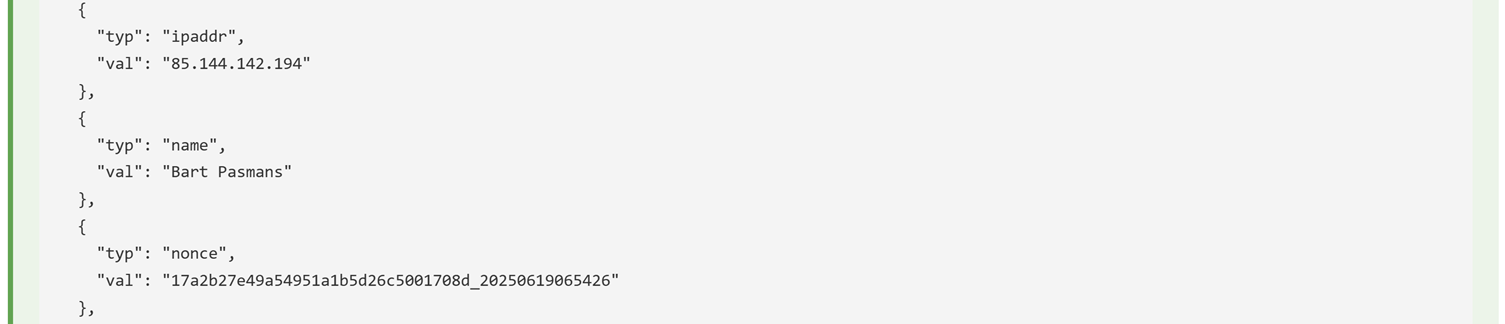
And you can see the claims we have from the user:
As we now have a JWT token, we can use this to communicate with other authenticated services as well!
Authentication endpoints
The App Service has authentication endpoints you can query to get details. For instance;
- /.auth/me (you get all the information from the current logged on user)
- /.auth/login/aad (login with azure Entra ID)
- /.auth/logout (makes sense? Destroy your token and session, and logout)
- /.auth/refresh (when a token is expiring or expired this endpoint will be used to get a new access token)
You can get information about these endpoints by simply browsing to them in your browser. In my example for both app services the endpoint is similar to: https://bartpasmans.azurewebsites.net/.auth/me
Showing me the information of the current logged in user:
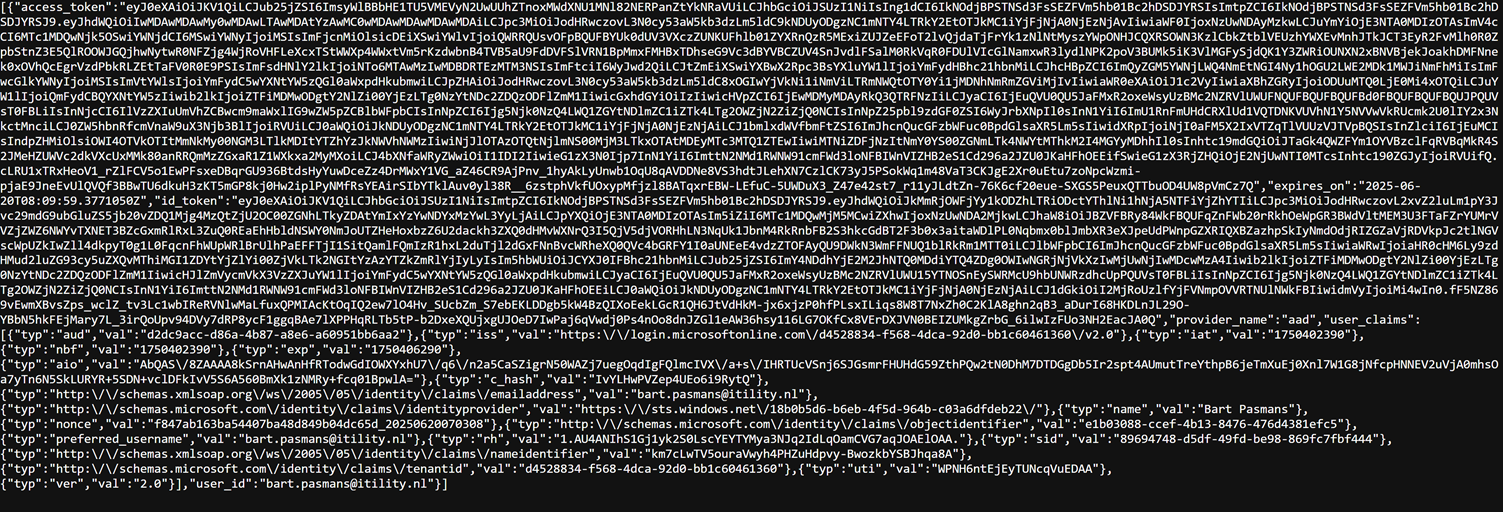
This information we’ll also be using for downstream communication towards our API. So that the current logged-on user is used to communicate with the API.
API trusted audience
When a user accesses your Web App, Azure App Service Easy Auth (or any authentication middleware) first authenticates the user, typically via Entra ID, and issues an ID token or access token where the audience (aud claim) matches the Web App’s client ID.
Now, if the Web App wants to call a backend API on behalf of the user, it might try to reuse that token to authenticate to the API. But here’s the catch:
The token’s audience claim (aud) still points to the Web App, not the API.
Because of that, the API will reject the token it was never meant for the API, and the API doesn’t trust it.
This is intentional and part of OAuth 2.0’s design: each token is issued for a specific recipient (the audience). It prevents tokens from being reused in unintended contexts.
Now, when the Web App forwards this token to the API, the API inspects it and sees:
❌ “Hey, this token wasn’t issued for me, the aud doesn’t match my App ID!”
To fix this, we must explicitly configure the API to trust tokens that originate from the Web App.
🎬 Modify the API to trust the audience of the Web App
- Go to the API and go to the ‘Authentication’ page

- Click the edit icon in the Identity provider
- Modify the ‘Client Application Requirements’
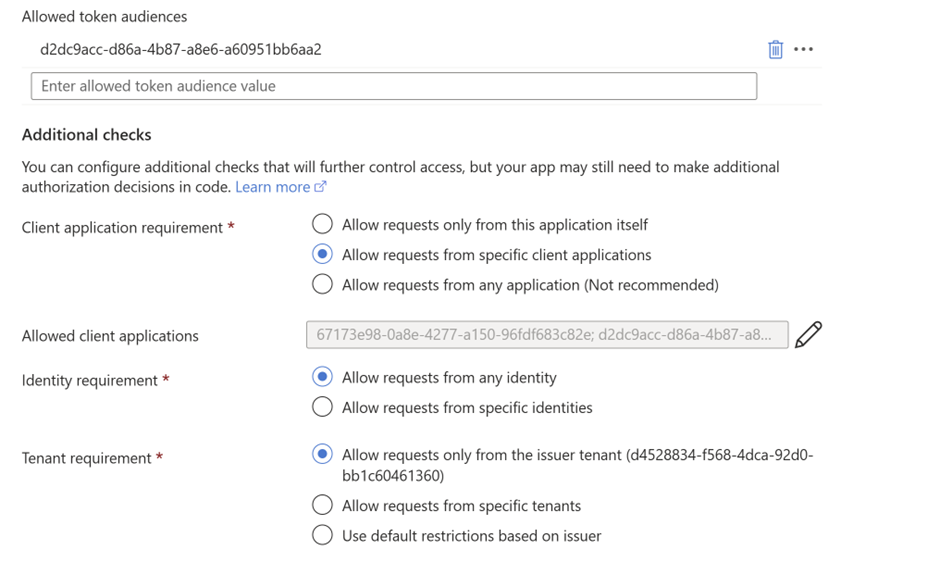
- Add the client ID of the Web App to the list of ‘Allowed Client Applications’
- Add the client ID to the list of ‘Allowed Token audiences’ as well
- Save your changes
Testing downstream
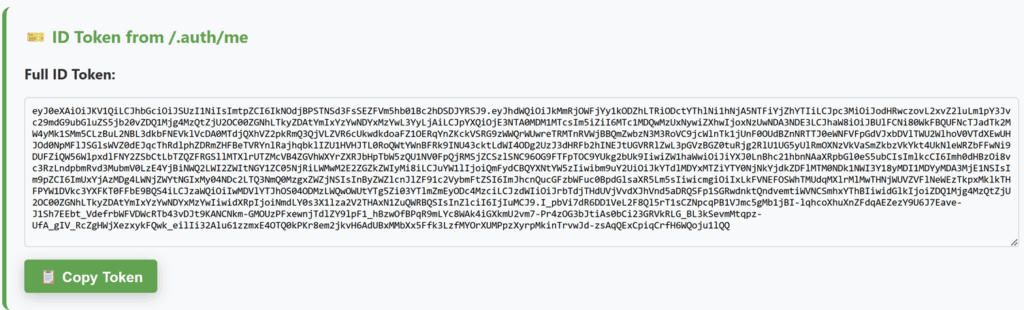
Now let’s test everything! Go to the Web App and copy the full value of the ID token:
Open your favorite HTTP request tool (PowerShell, curl, postman) and let’s make a request to the API to see how that goes!
In the GET URL I’ve placed my URL of course, but replace this one with the URL of the API you’ve deployed.
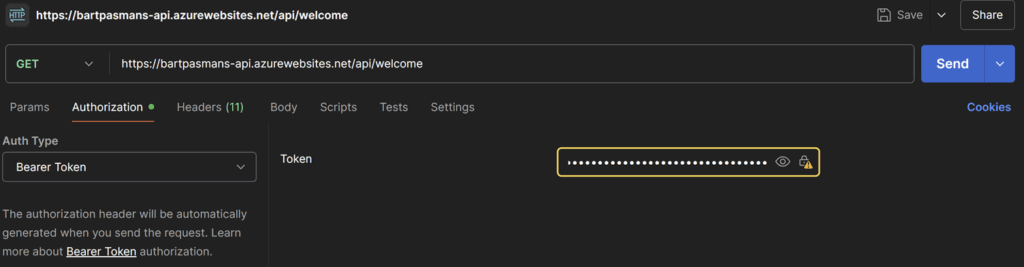
Add the value you copied from the ID Token field and add that as a bearer token in the authorization headers. Then execute the request by pressing ‘send’, or whatever command you have to execute in your preferred tool, to send the HTTP request.
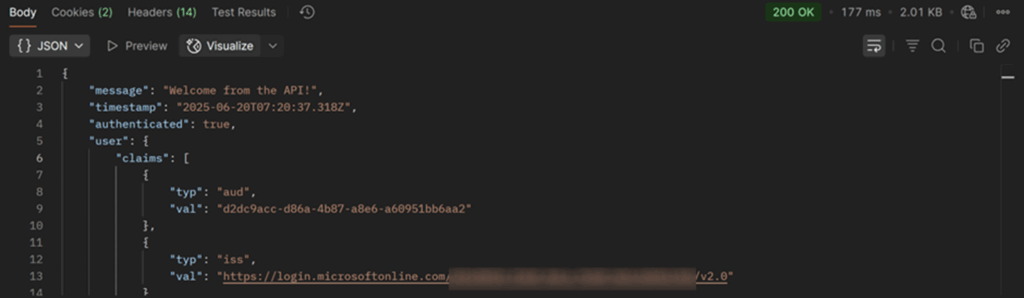
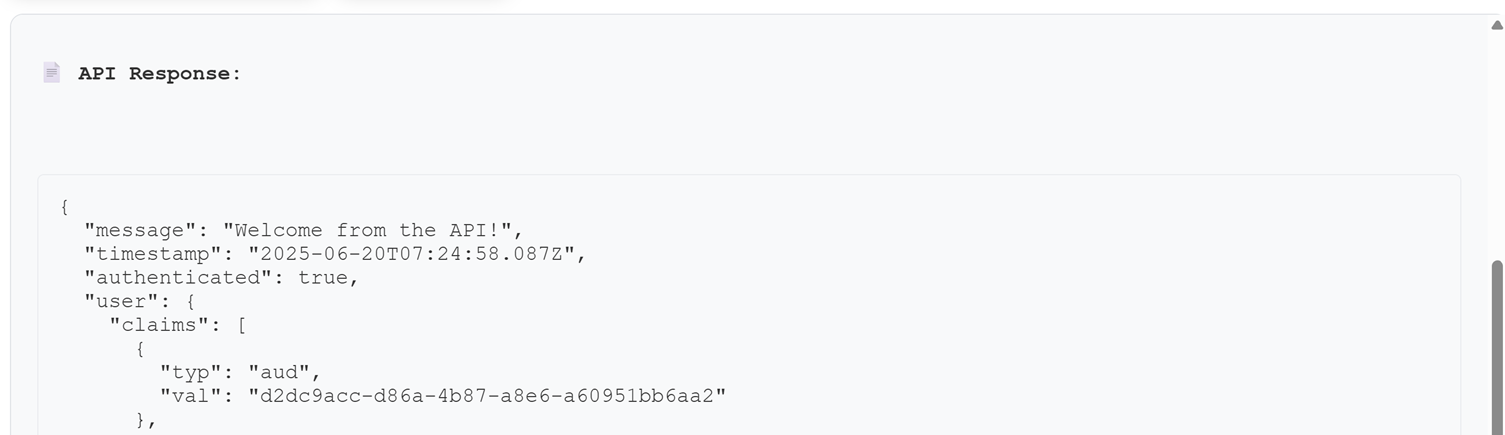
The API will now respond
Also test it, by making a mistake in the bearer token and you will see that the token cannot be validated and that the API now refuses the connection:

You can also use the WebApp I’ve provided and call the downstream API from there
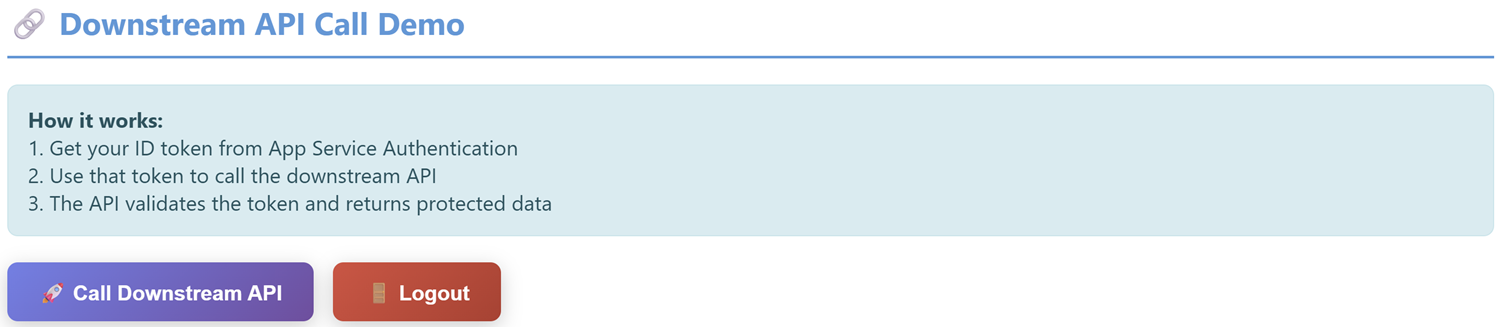
You will get the same result
That’s it, you can extend this further to even check RBAC on the token claims in your API if you want to! 😉
For this blog I won’t go that far into the technical details but hopefully this is a good start to get you up-to-speed!
Summary
In this post, we unlocked a powerful layer of security by diving into Azure App Service Authentication and configuring downstream token access between a web app and an API, all without writing your authentication logic 🎉.
We started by exploring why App Services are public by default and how App Service Authentication can help you protect your app without the need for private networking or IP whitelisting. Think of it as a plug-and-play security layer that enforces identity control all through configuration ✅.
Next, it was action time:
🎬 You created an App Registration in Entra ID, added a secret, and set up your Web App + API with proper auth settings.
🎬 Then came the deployment (manual or via the handy ‘Deploy to Azure’ button 🚀), followed by configuring your app registration to support ID tokens and define callback URLs.
We tested the authentication flow, saw the login experience in action, and viewed JWT claims using built-in endpoints like /.auth/me. With the ID token in hand, you learned how to securely pass it from your Web App to your API 🔒.
But we didn’t stop there, we tackled the token audience problem, ensuring your API only accepts tokens it trusts. 🎬 You updated the API’s and allowed clients and token audiences to complete the handshake between the Web App and API. With that in place, downstream calls now succeed using the user’s identity. Magic ✨.
Now you’ve got a secured Web App that authenticates users via Entra ID and calls an API on their behalf – no custom auth code needed. This is a solid foundation to expand into RBAC, token claim checks, and more.
Hope this helped you level up your app security game and made authentication just a little less painful. Keep securing, keep learning and as always, have fun doing it! 😎
Someone essentially help to make severely articles I’d state.
This is the very first time I frequented your website page and
thus far? I surprised with the analysis you made to create this particular post amazing.
Excellent activity!