
When I’m giving training on what PowerShell is, how to use it, and showing people how I apply it in real scenarios, I often get questions about real-life business cases. Most people get the gist of PowerShell and see how it could help them in their day-to-day tasks, but they still struggle to connect the theory from training with practical use.
Of course, I always include hands-on examples and some of my own real-world scripts but even then, one question keeps popping up: “Yeah, but how do you actually use it most of the time?”
Fair question. So, I figured I’d stop repeating myself in conversations and just write it down once and for all.
This blog series kicks off with my personal PowerShell Top 10, the cmdlets I use the most in my daily work. These aren’t just theoretical examples; they’re tools I rely on regularly to make life easier, save time, and keep things running smoothly.
Whether you’re just getting started or looking to expand how you use PowerShell in real operations, I hope this gives you some concrete inspiration.
🚀 Let’s dive in.
For those who don’t know, PowerShell
PowerShell is the Swiss army knife of automation. Created by Microsoft as an object-oriented scripting language within their operating system. Although already also supported on Linux.
It’s made up of a command-line shell and a scripting language, both built on top of . .NET. In plain English? It’s a powerful tool that lets you automate boring, repetitive, or complex tasks across your systems, whether you’re working with Windows, Active Directory, Azure, Exchange, or even non-Microsoft platforms.
What makes PowerShell so great (and different from old-school CMD or bash) is that it works with objects, not just text. That means you get structured data you can filter, sort, and manipulate way more easily than parsing strings. It’s designed for admins, by admins.
If you’re managing infrastructure or services in any serious way, knowing your way around PowerShell is a must. And once you get the hang of it, you’ll wonder how you ever lived without it.
What are PowerShell CMDLets
So, when starting with PowerShell or working with it you probably heard of the term ‘CMDLet’. So what exactly is a CMDLet?
Cmdlets (pronounced command-lets) are the building blocks of PowerShell. They’re small, lightweight commands that do specific tasks, kind of like mini tools in a big toolbox. Each one is designed to do one thing well, like getting data, setting configurations, creating users, managing files, or kicking off more complex scripts.
They all follow a consistent Verb-Noun naming convention, like:
- Get-Process – grab info about running processes
- Set-Item – change the value of something
- New-ADUser – create a new Active Directory user
- Remove-Item – delete a file, folder, or registry key
Long story short: cmdlets are where the magic happens. And in the next section, I’ll show you the ten I use the most, how I use them, and why they keep showing up in my scripts and day-to-day work.
My Personal top 10
So, enough with the ‘pre-chit-chat’ time for some diving in. Here we go!
Get-Type
| What it does | As PowerShell is an object-oriented scripting language, it’s very handy to know what type of object you are dealing with. This also helps you in your journey in exploring documentation, getting object properties, etc. |
| How to use | Put the result of a commandlet in a variableUse ‘.GetType()’ on the variable to see the type |
| Screenshot (example) | 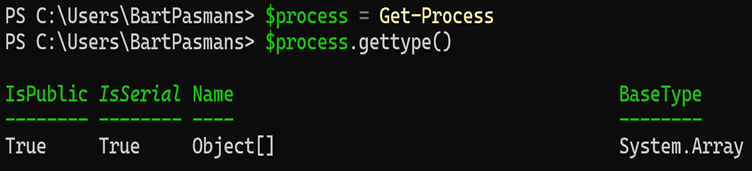 |
Invoke-WebRequest / Invoke-RestMethod
Both have simila
r functionality but Invoke-RestMethod helps translating the result of the call better to an object. But Invoke-WebRequest has more features and has detailed information which invoke-restmethod lacks.
I prefer to use Invoke-WebRequest for scripts and for testing I stick to Invoke-RestMethod more often.
Invoke-WebRequest is more general and returns detailed web response data (including headers, status, and content).
Invoke-RestMethod is optimized for REST APIs and automatically parses JSON or XML responses into PowerShell objects for easier handling.
| What it does | Executes a web request to a webpage or API and gets the response. They allow you to interact with RESTful endpoints, download content, submit forms, or consume web APIs. |
| How to use | 1. Assign the result of a web request to a variable. 2. Use the variable to explore the response, access content, headers, status code, or parsed objects. 3. Choose Invoke-WebRequest when you need raw response details (like headers or forms). Use Invoke-RestMethod when you want PowerShell objects from JSON/XML API responses. | |
| Screenshot (example) | 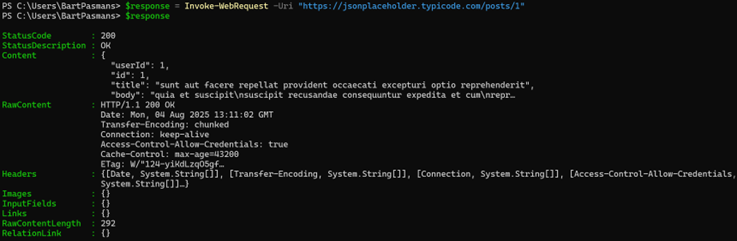  |
Test-NetConnection
| What it does | Test-NetConnection is a versatile network diagnostic cmdlet that helps you check the connectivity status to a remote host, port, or service. It’s like a modern combination of ping, tracert, and port testing tools, showing you if the target is reachable and whether specific ports are open. |
| How to use | 1. Use Test-NetConnection with a hostname or IP to check basic connectivity (similar to ping).Add the -Port parameter to test if a specific port on the target machine is reachable (e.g., web servers on port 80 or 443).Use -InformationLevel Detailed to get a full diagnostic report including route hops and connection status. |
| Screenshot (example) | 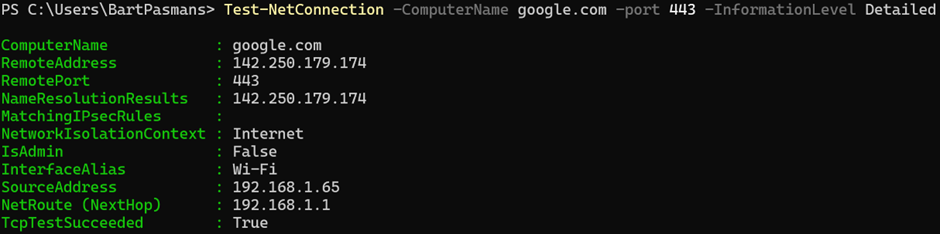 |
ConvertTo-JSON / ConvertFrom-JSON
| What it does | What it does | These cmdlets are used to work with JSON (JavaScript Object Notation) data in PowerShell. ConvertTo-JSON converts PowerShell objects into JSON-formatted strings, useful for sending data to APIs or saving configurations. ConvertFrom-JSON converts JSON-formatted strings into PowerShell objects, allowing you to manipulate JSON data easily. |
| How to use | 1. Use ConvertTo-JSON to serialize PowerShell objects into JSON text. 2. Use ConvertFrom-JSON to parse JSON strings into PowerShell objects for easy property access. 3. These cmdlets are essential for working with REST APIs that communicate using JSON. |
| Screenshot (example) |  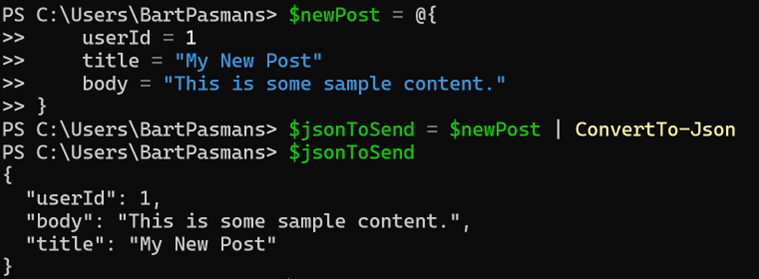 |
Get-Content
| What it does | reads the contents of a file (like text files, logs, scripts) line-by-line and outputs it to the console or into a variable as an array of strings. It’s very handy for reading data from files for processing in scripts. |
| How to use | 1. Use Get-Content with a file path to read the entire file. |
| Screenshot (example) |  |
Where-Object
| What it does | filters objects in the pipeline based on specified criteria. It lets you select only those items that meet conditions you define, making it essential for processing collections and query results. |
| How to use | Pipe a collection of objects into Where-Object. Use a script block {} to specify the filtering condition, referencing properties of the objects. It outputs only the objects matching the condition, which you can assign to a variable or continue processing. |
| Screenshot (example) |  |
Foreach-Object
| What it does | processes each item coming through the pipeline individually. It lets you run a block of code on every object, which is great for performing operations like transformations, calculations, or invoking methods on each item. |
| How to use | 1. Pipe a collection of objects into Foreach-Object. Use a script block {} to define what to do with each object ($_ refers to the current object). You can output processed objects or perform side effects like writing to files or making web requests. |
| Screenshot (example) | 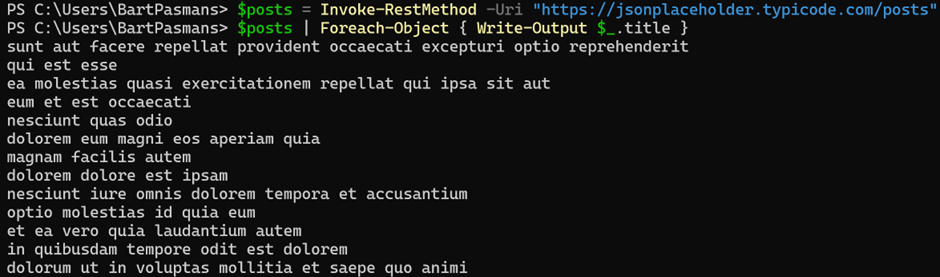 |
Add-Member
| What it does | adds properties or methods to existing PowerShell objects. This is useful when you want to extend or customize objects with extra information that isn’t part of the original data Really like this one as it helps in creating a more dynamic object on the fly |
| How to use | 1. Create or get an object. Use Add-Member to add a property or method with a name and value. The modified object now includes the new member and can be used in subsequent processing. |
| Screenshot (example) |  |
Format-Table
| What it does | formats output objects as a table in the console, making data easier to read and compare by arranging properties in columns. It’s mostly used for displaying data rather than for further processing. |
| How to use | 1. Pipe a collection of objects into Format-Table. Specify the properties you want to display as columns. Optionally, use parameters like -AutoSize to fit columns or -Wrap to wrap long text. 😉 for those who like to to read things formatted in a structured way |
| Screenshot (example) | 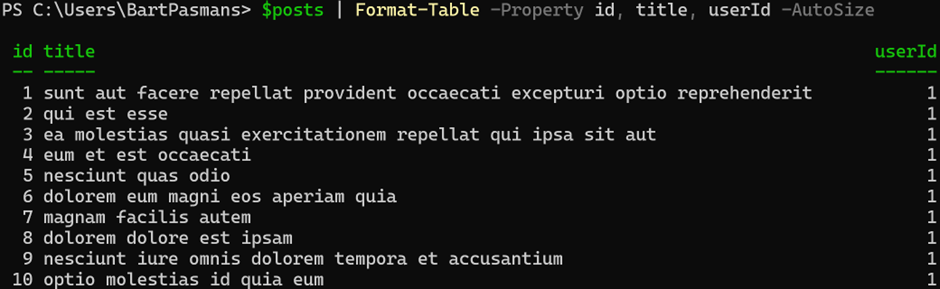 |
Write-Progress
| What it does | displays a progress bar in the PowerShell console, useful for showing the status of long-running scripts or operations to give visual feedback to the user. Especially when creating those long running user interacted scripts this is a nice one! Really feels like you are pulling your user into your scripting progress! |
| How to use | 1. Use Write-Progress inside a loop or process that takes time. Specify the progress bar title, activity, percent complete, and status message. Update progress periodically to keep users informed. |
| Screenshot (example) |  |
Summary
That’s a wrap on my personal PowerShell Top 10! 🎉
In this post, we’ve gone beyond theory and dug into the actual cmdlets I rely on every day to automate, troubleshoot, and streamline my work. From exploring object types with .GetType() to making web requests, filtering data, and even adding custom properties on the fly, these tools are the building blocks that power my scripts and daily tasks.
We covered essential cmdlets like Invoke-WebRequest and Invoke-RestMethod for API interaction, Test-NetConnection for network diagnostics, and handy data manipulation commands like ConvertTo-JSON, Get-Content, and powerful pipeline workhorses such as Where-Object and Foreach-Object. Plus, we touched on presentation tools like Format-Table and user-friendly touches with Write-Progress.
Whether you’re just starting with PowerShell or looking for practical ways to apply it in your day-to-day work, I hope this list inspires you to explore these cmdlets and start building your own toolkit.
PowerShell is not just a scripting language, it’s your automation Swiss army knife. Keep experimenting, keep automating, and watch how it transforms your workflow.
Thanks for reading! Drop a comment or share how you use PowerShell in your daily grind
I’d love to hear your stories. 🚀
Don’t forget to catch up on my other blogs on PowerShell they use the same CMDlets and bring it even further!