
Yes, We’re Actually Deploying It This Time! 🚀
Welcome back! If you joined me in Part 1, you already know we’re on a mission to prove that PowerShell can do a whole lot more than run scripts on a Windows machine. It can be containerized, deployed, scaled, and orchestrated, right inside Azure Kubernetes Service (AKS).
Missed part1 ? Here you can find it:
PowerShell Microservices on AKS Part 1
In this second part of the series, we’re finally rolling up our sleeves and getting hands-on. No more theory, now we’re actually building our first PowerShell microservice, packaging it into a container, pushing it to an Azure Container Registry (ACR), and deploying it onto AKS using Helm. 🎉
Still the same disclaimer as before:
👉 This blog is not about debating architecture, cost models, or whether PowerShell microservices are a “good idea.”
We’re here for one reason only: “To explore what’s possible and have fun doing it.” 😄
Throughout this post, you’ll again see the 🎬 icon highlighting steps you should actively follow along with, as well as 💡 notes that provide helpful context and tips so you don’t get lost on the way.
By the end of this walkthrough, you’ll have your first PowerShell service running inside AKS, and you’ll be able to test it live. Yes, really. PowerShell. In Kubernetes. Responding to requests.
Alright, enough talking. Let’s build something! 🚀
What we’ll be using
To help you get started I’ve prepared some material you’ll need throughout this blog which you can find here.
DockerFile
# Use official PowerShell image based on Alpine Linux (smaller size)
FROM mcr.microsoft.com/powershell:latest

# Set working directory
WORKDIR /app

# Install Pode module
RUN pwsh -Command "Install-Module -Name Pode -Force -Scope AllUsers -AllowClobber"

# Copy the PowerShell scripts
COPY scripts/ /app/scripts/

# Expose port 8080
EXPOSE 8080

# Run the Pode server
CMD ["pwsh", "-File", "/app/scripts/server.ps1"]Server (server.ps1)
# Demo Service - Pode Web Server
# This service returns simple static data as JSON

Write-Host "========================================" -ForegroundColor Cyan
Write-Host "  PowerShell as a Service - Demo" -ForegroundColor Cyan
Write-Host "========================================" -ForegroundColor Cyan
Write-Host ""
Write-Host "[$(Get-Date -Format 'yyyy-MM-dd HH:mm:ss')] Starting demo-service..." -ForegroundColor Green
Write-Host "[$(Get-Date -Format 'yyyy-MM-dd HH:mm:ss')] PowerShell Version: $($PSVersionTable.PSVersion)" -ForegroundColor Yellow
Write-Host ""

# Import Pode module
Write-Host "[$(Get-Date -Format 'yyyy-MM-dd HH:mm:ss')] Importing Pode module..." -ForegroundColor Yellow
Import-Module Pode
Write-Host "[$(Get-Date -Format 'yyyy-MM-dd HH:mm:ss')] Pode version: $((Get-Module -Name Pode).Version)" -ForegroundColor Yellow
Write-Host ""

# Start the Pode server
Write-Host "[$(Get-Date -Format 'yyyy-MM-dd HH:mm:ss')] Initializing Pode server..." -ForegroundColor Green
Start-PodeServer {

    Write-Host "[$(Get-Date -Format 'yyyy-MM-dd HH:mm:ss')] Configuring HTTP endpoint on port 8080..." -ForegroundColor Yellow
    # Add HTTP endpoint listening on all interfaces
    Add-PodeEndpoint -Address * -Port 8080 -Protocol Http

    Write-Host "[$(Get-Date -Format 'yyyy-MM-dd HH:mm:ss')] Enabling request logging..." -ForegroundColor Yellow
    # Enable request logging
    New-PodeLoggingMethod -Terminal | Enable-PodeRequestLogging

    Write-Host ""
    Write-Host "[$(Get-Date -Format 'yyyy-MM-dd HH:mm:ss')] Registering API endpoints..." -ForegroundColor Green
    Write-Host "[$(Get-Date -Format 'yyyy-MM-dd HH:mm:ss')]   -> GET /health" -ForegroundColor Cyan
    # Health check endpoint
    Add-PodeRoute -Method Get -Path '/health' -ScriptBlock {
        Write-PodeJsonResponse -Value @{
            status = "healthy"
            service = "demo-service"
            timestamp = (Get-Date -Format "o")
        }
    }

    Write-Host "[$(Get-Date -Format 'yyyy-MM-dd HH:mm:ss')]   -> GET /api/demo" -ForegroundColor Cyan
    # Main demo endpoint - returns static data
    Add-PodeRoute -Method Get -Path '/api/demo' -ScriptBlock {
        Write-PodeJsonResponse -Value @{
            service = "demo-service"
            message = "Hello from PowerShell as a Service!"
            data = @{
                items = @(
                    @{ id = 1; name = "Item One"; value = 100 }
                    @{ id = 2; name = "Item Two"; value = 200 }
                    @{ id = 3; name = "Item Three"; value = 300 }
                )
                totalCount = 3
                generatedAt = (Get-Date -Format "o")
            }
            version = "1.0.0"
        }
    }

    Write-Host "[$(Get-Date -Format 'yyyy-MM-dd HH:mm:ss')]   -> GET /api/info" -ForegroundColor Cyan
    # Info endpoint - returns service information
    Add-PodeRoute -Method Get -Path '/api/info' -ScriptBlock {
        Write-PodeJsonResponse -Value @{
            serviceName = "demo-service"
            description = "A demo PowerShell service running on Pode"
            powershellVersion = $PSVersionTable.PSVersion.ToString()
            podeVersion = (Get-Module -Name Pode).Version.ToString()
            platform = $PSVersionTable.Platform
            os = $PSVersionTable.OS
            endpoints = @(
                @{ method = "GET"; path = "/health"; description = "Health check endpoint" }
                @{ method = "GET"; path = "/api/demo"; description = "Demo endpoint with static data" }
                @{ method = "GET"; path = "/api/info"; description = "Service information" }
            )
        }
    }

    Write-Host "[$(Get-Date -Format 'yyyy-MM-dd HH:mm:ss')]   -> GET /" -ForegroundColor Cyan
    # Root endpoint
    Add-PodeRoute -Method Get -Path '/' -ScriptBlock {
        Write-PodeJsonResponse -Value @{
            message = "Welcome to PowerShell as a Service - Demo Service"
            availableEndpoints = @(
                "/health"
                "/api/demo"
                "/api/info"
            )
        }
    }
}Helmchart (chart.yaml)
apiVersion: v2
name: demo-service
description: A Helm chart for PowerShell Demo Service running on Pode
type: application
version: 1.0.0
appVersion: "1.0.0"
keywords:
  - powershell
  - pode
  - microservice
maintainers:
- name: PowerShell as Service TeamValues (values.yaml)
# Default values for demo-service Helm chart
# This is a YAML-formatted file.
# Declare variables to be passed into your templates.

replicaCount: 2

image:
  repository: acrbpas.azurecr.io/powershellservice
  pullPolicy: IfNotPresent
  tag: "latest"

imagePullSecrets: []
nameOverride: ""
fullnameOverride: ""

service:
  type: ClusterIP
  port: 80
  targetPort: 8080

ingress:
  enabled: false
  className: ""
  annotations: {}
    # kubernetes.io/ingress.class: nginx
    # cert-manager.io/cluster-issuer: letsencrypt-prod
  hosts:
    - host: demo-service.local
      paths:
        - path: /
          pathType: Prefix
  tls: []
  #  - secretName: demo-service-tls
  #    hosts:
  #      - demo-service.local

resources:
  limits:
    cpu: 500m
    memory: 512Mi
  requests:
    cpu: 250m
    memory: 256Mi

autoscaling:
  enabled: false
  minReplicas: 2
  maxReplicas: 10
  targetCPUUtilizationPercentage: 80
  # targetMemoryUtilizationPercentage: 80

nodeSelector: {}

tolerations: []

affinity: {}

# Liveness and readiness probes
livenessProbe:
  httpGet:
    path: /health
    port: 8080
  initialDelaySeconds: 30
  periodSeconds: 10
  timeoutSeconds: 5
  failureThreshold: 3

readinessProbe:
  httpGet:
    path: /health
    port: 8080
  initialDelaySeconds: 10
  periodSeconds: 5
  timeoutSeconds: 3
failureThreshold: 3Service (service.yaml)
apiVersion: v1
kind: Service
metadata:
  name: {{ include "demo-service.fullname" . }}
  labels:
    {{- include "demo-service.labels" . | nindent 4 }}
spec:
  type: {{ .Values.service.type }}
  ports:
    - port: {{ .Values.service.port }}
      targetPort: {{ .Values.service.targetPort }}
      protocol: TCP
      name: http
  selector:
{{- include "demo-service.selectorLabels" . | nindent 4 }}Deployment (deployment.yaml)
apiVersion: apps/v1
kind: Deployment
metadata:
  name: {{ include "demo-service.fullname" . }}
  labels:
    {{- include "demo-service.labels" . | nindent 4 }}
spec:
  {{- if not .Values.autoscaling.enabled }}
  replicas: {{ .Values.replicaCount }}
  {{- end }}
  selector:
    matchLabels:
      {{- include "demo-service.selectorLabels" . | nindent 6 }}
  template:
    metadata:
      labels:
        {{- include "demo-service.selectorLabels" . | nindent 8 }}
    spec:
      {{- with .Values.imagePullSecrets }}
      imagePullSecrets:
        {{- toYaml . | nindent 8 }}
      {{- end }}
      containers:
      - name: {{ .Chart.Name }}
        image: "{{ .Values.image.repository }}:{{ .Values.image.tag | default .Chart.AppVersion }}"
        imagePullPolicy: {{ .Values.image.pullPolicy }}
        ports:
        - name: http
          containerPort: {{ .Values.service.targetPort }}
          protocol: TCP
        livenessProbe:
          {{- toYaml .Values.livenessProbe | nindent 10 }}
        readinessProbe:
          {{- toYaml .Values.readinessProbe | nindent 10 }}
        resources:
          {{- toYaml .Values.resources | nindent 10 }}
      {{- with .Values.nodeSelector }}
      nodeSelector:
        {{- toYaml . | nindent 8 }}
      {{- end }}
      {{- with .Values.affinity }}
      affinity:
        {{- toYaml . | nindent 8 }}
      {{- end }}
      {{- with .Values.tolerations }}
      tolerations:
        {{- toYaml . | nindent 8 }}
{{- end }}Helpers (_helpers.tpl)
{{/*
Expand the name of the chart.
*/}}
{{- define "demo-service.name" -}}
{{- default .Chart.Name .Values.nameOverride | trunc 63 | trimSuffix "-" }}
{{- end }}

{{/*
Create a default fully qualified app name.
*/}}
{{- define "demo-service.fullname" -}}
{{- if .Values.fullnameOverride }}
{{- .Values.fullnameOverride | trunc 63 | trimSuffix "-" }}
{{- else }}
{{- $name := default .Chart.Name .Values.nameOverride }}
{{- if contains $name .Release.Name }}
{{- .Release.Name | trunc 63 | trimSuffix "-" }}
{{- else }}
{{- printf "%s-%s" .Release.Name $name | trunc 63 | trimSuffix "-" }}
{{- end }}
{{- end }}
{{- end }}

{{/*
Create chart name and version as used by the chart label.
*/}}
{{- define "demo-service.chart" -}}
{{- printf "%s-%s" .Chart.Name .Chart.Version | replace "+" "_" | trunc 63 | trimSuffix "-" }}
{{- end }}

{{/*
Common labels
*/}}
{{- define "demo-service.labels" -}}
helm.sh/chart: {{ include "demo-service.chart" . }}
{{ include "demo-service.selectorLabels" . }}
{{- if .Chart.AppVersion }}
app.kubernetes.io/version: {{ .Chart.AppVersion | quote }}
{{- end }}
app.kubernetes.io/managed-by: {{ .Release.Service }}
{{- end }}

{{/*
Selector labels
*/}}
{{- define "demo-service.selectorLabels" -}}
app.kubernetes.io/name: {{ include "demo-service.name" . }}
app.kubernetes.io/instance: {{ .Release.Name }}
{{- end }}You should end up with something like this:
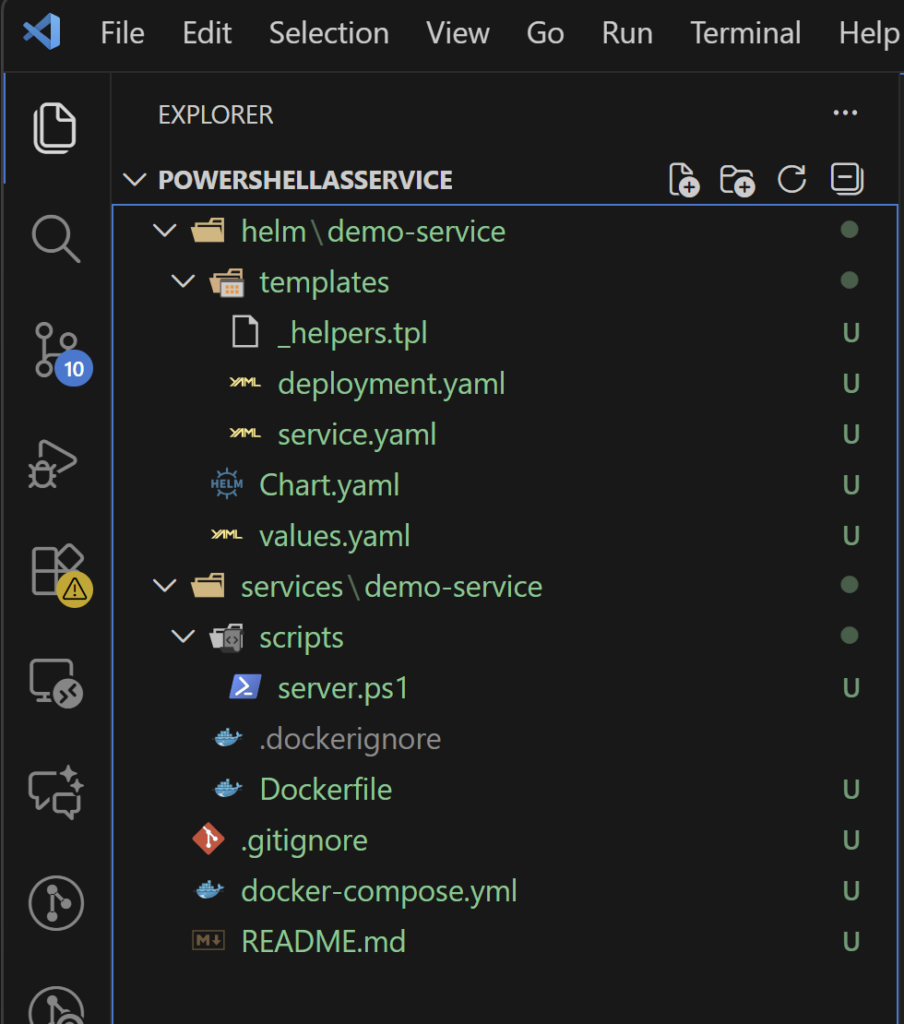
First docker image
Before our PowerShell service can even think about running on AKS, it needs a proper vessel. Kubernetes does not deploy scripts, folders, or good intentions. It deploys container images. So the very first real step in this journey is turning our PowerShell code into something AKS understands and can run. In this section, we will build that first image, give it a name, and send it off to Azure Container Registry so it is ready and waiting when AKS comes calling.
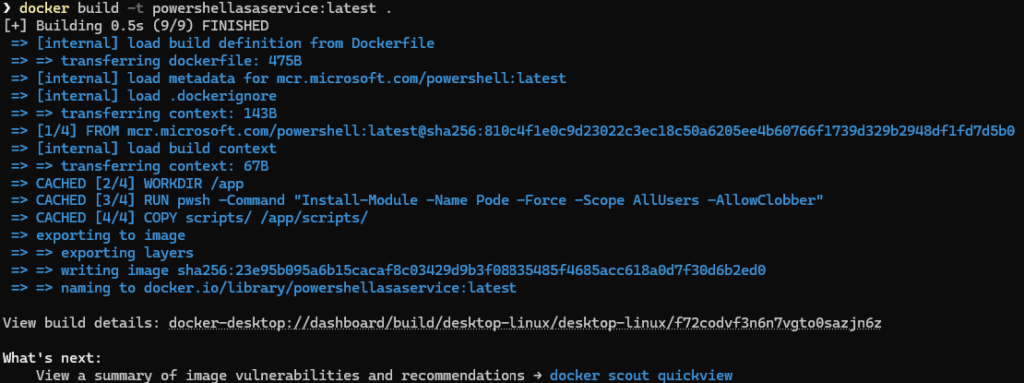
🎬Follow the steps below to create the first image
- Go to the directory where the dockerfile is located (check previous section for files needed)
- Run the command “docker build -t powershellasaservice:latest .” Do not forget the ‘.’ In the end!
You should see the result as shown below:
- Tag the image with the command “docker tag powershellasaservice:latest acrbpas.azurecr.io/powershellservice:latest”
💡In my situation I have to use “acrbpas.azurecr.io” but make sure you place your own Azure Container Registry path here which you can find in the Azure Portal on your deployed Image repository.
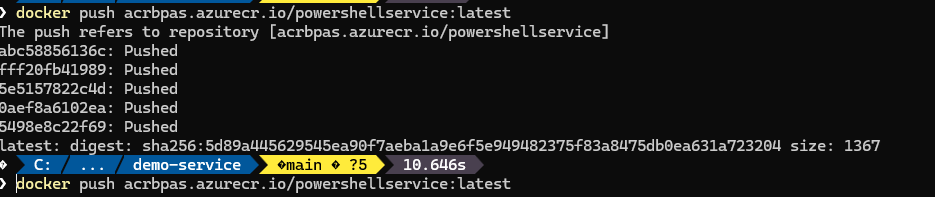
- Now push the image to the remote repository with: “docker push acrbpas.azurecr.io/powershellservice:latest”
Again, make sure you update the path accordingly
You now should see that the image is pushed
- You can validate it by going to your image repository which should now look like below:
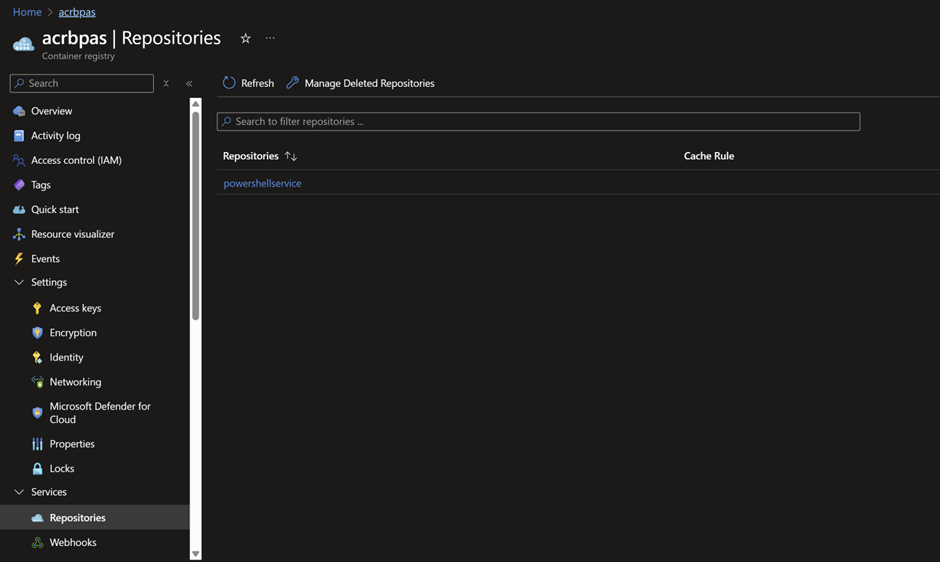
Connect ACR and AKS
Our container image is safely stored in Azure Container Registry, but right now AKS has no idea it even exists. Before the cluster can pull and run our PowerShell service, we need to introduce the two to each other. In this step, we will grant AKS permission to access ACR so it can securely fetch the image whenever it needs to start or scale our service. Think of this as giving AKS the keys to the registry. Once that trust is in place, everything else starts to fall into place.
🎬 Run the commands below to connect the ACT to AKS
- “az aks update -n bpasaks -g az-dev-weu-aks-001 –attach-acr acrbpas”
💡 Make sure you update the bold typed values to your own values!
On the first place the name of the AKS cluster, second place the resource-group where the AKS is located in and on the third placeholder the name of the container registry.
You should get the result as shown below

- Validate with “az aks show -n bpasaks -g az-dev-weu-aks-001 –query “servicePrincipalProfile””
You should see:

Deploy with Helm
Before we run anything, we need to introduce one more character in this story: Helm.
As soon as applications in Kubernetes grow beyond the very basics, things can get messy. A deployment here, a service there, maybe some configuration values sprinkled in between. You could apply all of those files one by one, but that quickly turns into a fragile and error-prone ritual. This is where Helm earns its place.
Think of Helm as the instruction manual Kubernetes actually understands. Instead of handing Kubernetes a pile of loose papers, Helm bundles everything together into a single package called a chart. That chart describes what should be deployed, how it should be configured, and how all the pieces fit together. With one command, Helm reads the chart and takes care of creating the right resources in the right order.
In this step, we will use Helm to install our PowerShell service into the cluster. Helm will translate our intent into running pods and services, and once it is done, Kubernetes takes over and keeps everything running. This is the moment where our PowerShell code officially becomes a Kubernetes workload.
🎬 follow the steps below
- First we need to get credentials for the AKS cluster
az aks get-credentials --resource-group az-dev-weu-aks-001 --name bpasaks💡 Make sure you update the bold typed values to your own values
- Now make sure you are in the root directory of the project
- Run the following command
helm install powershellasaservice .\helm\demo-service\When the command is done deploying the helm chart we can validate the services:
- Run the command below you should see the result;
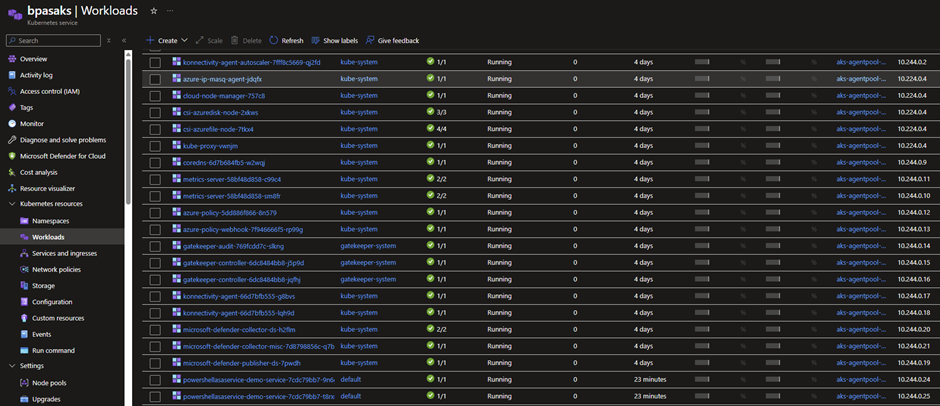
kubectl get pods
We can see the same result in Azure:
Run the command below you should see the result;
kubectl get services
Test the service
🎬 Run the commands below so we can temporarily test the service
kubectl port-forward service/powershellasaservice-demo-service 8080:80You should see:

💡See how the port-forward service value matches with the output from kubectl get services?
- Now run the command “curl http://localhost:8080” in a separate shell you should see the result below

In the shell we have the port-forwarding service enabled we see the incoming connection;

Success! We just validated that we get a response from our deployed pod.
Summary
We didn’t melt our GPU building images, we didn’t turn into Docker ninjas overnight, and we definitely didn’t summon Helm dragons from the depths of Kubernetes…
But we did take a very real step into running PowerShell as an actual microservice inside AKS, and that’s something most people never expect to see. 🐙⚙️🚀
Here’s what you walk away with:
You built your first container image:
From a humble Dockerfile to a tagged and pushed container in ACR. No magic, no mystery, just clean PowerShell packaged into a portable, cloud-ready box.
You connected AKS and ACR:
Your AKS cluster can now pull images straight from your registry without complaining, negotiating, or throwing errors like a moody teenager.
You deployed your first Helm chart:
Yes, Helm, the package manager of Kubernetes, the “apt-get” of the cloud. You installed your first release, created your service, and watched your pod spring to life. That’s a real microservice running PowerShell in a real cluster.
🎉 And the big picture:
This wasn’t theory anymore, this was execution.
Part 2 took you from “I have code” to “I have a running microservice in Kubernetes,” and that’s a massive leap in the containerized PowerShell world.
Because next time?
🔥 We scale beyond a single service
🔥 We explore more patterns for PowerShell microservices
🔥 And we start shaping a real, modular microservice architecture
Strap in… the adventure is far from over. On to part 3!!😉