

I regularly run into situation where PaaS resources are used which require external connectivity. For example, to API’s or to third party services that use whitelisting to allow only certain IP’s to access their resources. Whether you’re building APIs that need to communicate with external services or implementing security measures that require predictable outbound traffic!
But when deploying Azure App Services, Functions or any other resources which are configured for egress the public IP’s of the resources are addressed by Microsoft from a big scope of available addresses.
Having such a big scope makes it impossible to whitelist a single IP or brings you to the situation to open an entire range.
Luckily Azure has tricks to overcome this by assigning your own outbound IP Addresses so you can ‘circumvent’ this situation 😉
In this blog post I will show you how to setup the basics for this so you can get your service up and running ASAP!
During this post you’ll see this icon 🎬 which indicates that action is required so you get the full benefit out of this post.
📰 From now on I’ll include the ‘Deploy to Azure’ buttons to make it even easier for you! 😊. But feel free to follow the post step-by-step to learn how to do it yourself.
What are we going to do?
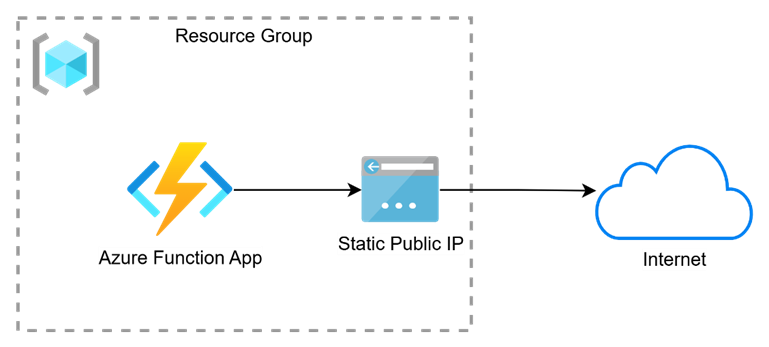
We will be setting up an Azure function with some basic code to query an external service to get our public outbound IP address. The diagram below shows what we’ll end up with at a high level.
⚠️ We do need to have a plan/SKU which supports networking configurations
Let me deploy it for you!
This is my first blog post where I’ll be making deployment profiles, so this is also a good practice for me 😉 (if you run into any issue during deployment please let me know!)
You will be asked to supply the parameters for deployment:
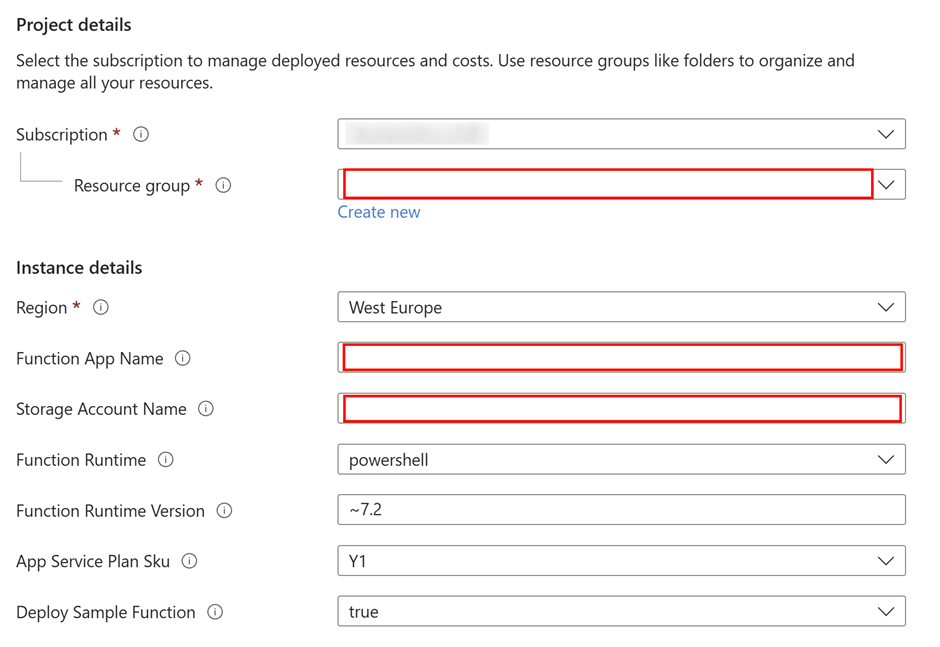
🎬 Fill in the details for deployment (the ones in red are mandatory)
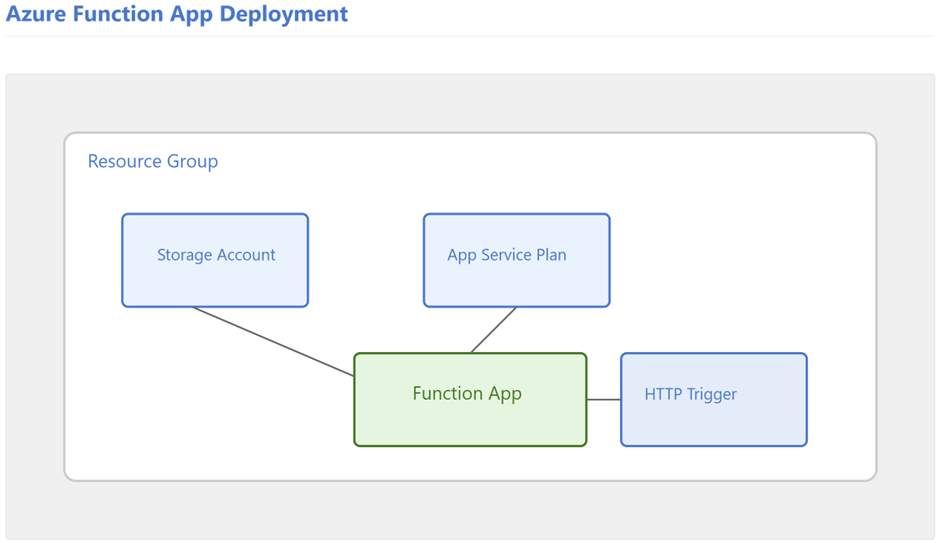
When you complete the deployment, this is what you will end up with:
As you can see, I haven’t deployed the static public IP configuration yet. We’ll keep that for later! 😉
Deploying it yourself?
If you decide to deploy everything yourself follow these instructions:
🎬 Follow the instructions described below
- Deploy a function app with app service plan P1V2
- Make sure the app is publicly reachable
- Create a HTTP trigger within the function app with the code mentioned below
using namespace System.Net

# Input bindings are passed in via param block.
param($Request, $TriggerMetadata)

write-host "Checking public IP";

$publicIPAddress = (Invoke-RestMethod -Uri "https://api.ipify.org?format=json").ip

$body = "";
if ($publicIPAddress) {
    $body = "Public IP: $publicIPAddress"
} else {
    $body = "Unable to validate public IP";
}

write-host $body;

# Associate values to output bindings by calling 'Push-OutputBinding'.
Push-OutputBinding -Name Response -Value ([HttpResponseContext]@{
    StatusCode = [HttpStatusCode]::OK
    Body = $body
})
Testing the function
When you have deployed the resources, either manually or by the deploy link I mentioned above, it’s time to test everything.
🎬Go to the function app and find the function you created
- Click the function to go to the testing page (in my example it’s called ‘HttpTrigger’)

- Click the Test/run button

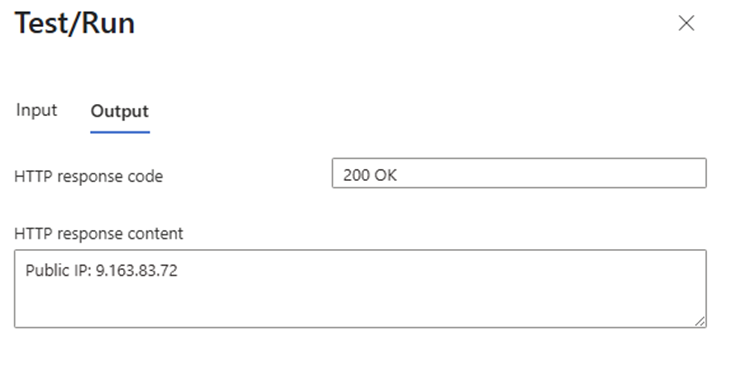
- Run the function’. You should get a result such as below
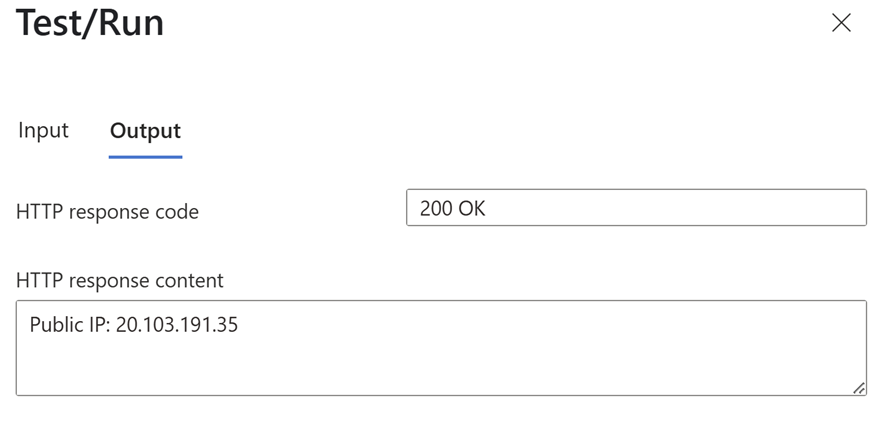
Note down the IP, in this case my public outbound IP address is: 20.103.191.35
Deploying your own outbound IP
Now it’s time to configure the function to egress with your own public IP address. Firstly, we need to deploy a public IP address resource.
🎬 Follow the instructions described below to deploy the public IP Address resource
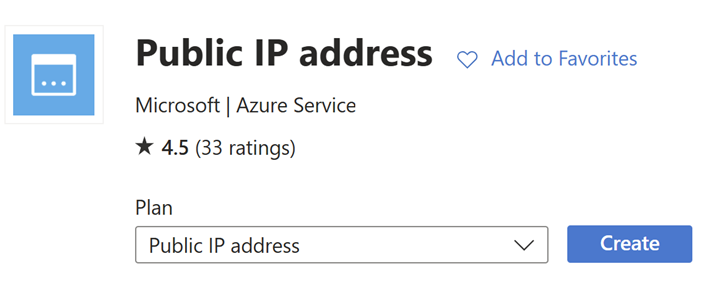
- Find the public IP address resource in the Azure Marketplace
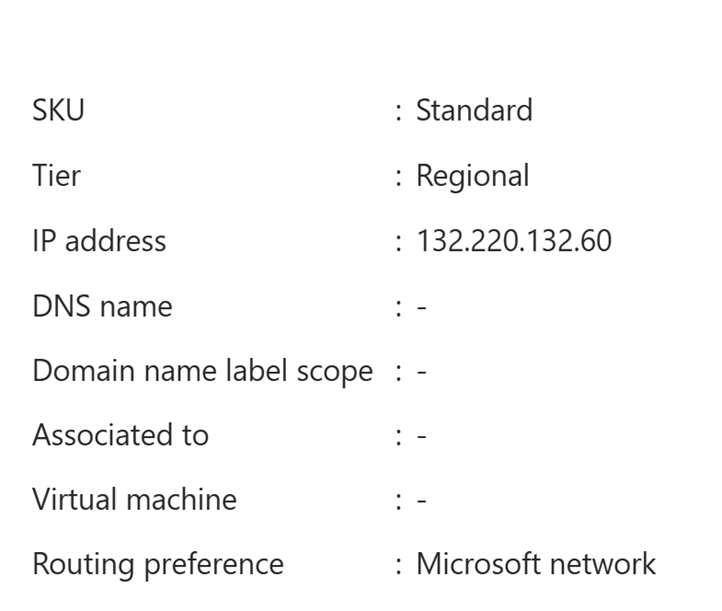
- You can leave all parameters with their default value as long as you keep the assignment method to ‘static’
- When finished, you should have the IP Address deployed like below:
- Also deploy a virtual network and a subnet with the default values (address space can be 10.0.0.0/8
- Now its time to deploy a NAT gateway (deploy a NAT gateway from the Azure Marketplace and make sure it gets connected to the VNET and subnet you just created)

- Now make sure the public IP address resource is also linked to the NAT gateway
Configuring the outbound IP
Now that the public IP address resource is deployed, we need to assign it. If you run the function, you will still see that the original IP Address is used. So, we need to make sure that the Azure function follows the new networking guidelines we just defined.
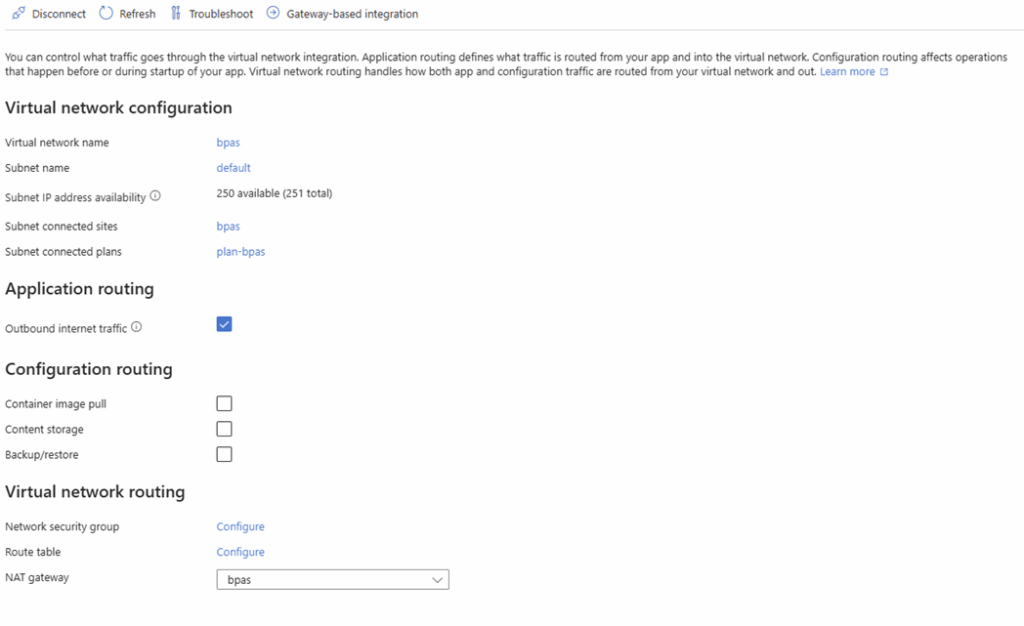
Open the networking configuration on the Azure function and configure the network settings:

Make sure its configured as outbound internet:
And now it’s time to test the function again! Go to the functions tab again and open the ‘HttpTrigger’ function totest it.
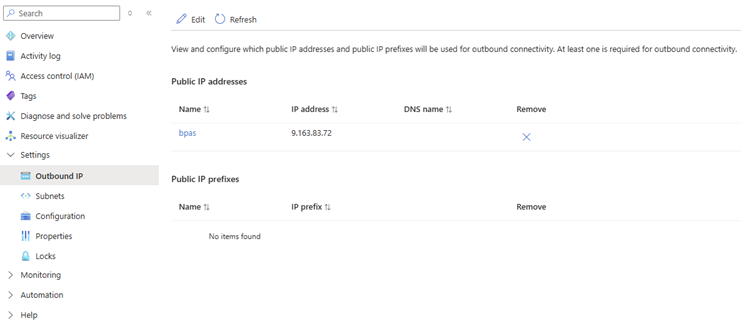
As you can see below, I now have my dedicated outgoing IP address for remote calls:
Summary
As we wrap up our journey through Azure’s networking landscape, let’s take a moment to reflect on what we’ve accomplished. We started with a common pain point – the unpredictable nature of Azure PaaS outbound IP addresses – and transformed it into a robust, controlled solution.
From Chaos to Control
Remember the initial frustration with IP whitelisting? We’ve turned that into a thing of the past. By combining the power of Premium V2 App Service Plans with NAT Gateways and static Public IPs, we’ve created a solution that gives you complete control over your outbound traffic identity.
The Cost-Benefit Balance
While the solution does come with additional costs (Premium V2 plan, NAT Gateway, static IP), the benefits far outweigh the investment. The peace of mind that comes with knowing that your outbound traffic has a consistent identity, is a great benefit! Especially when dealing with third-party services that require IP whitelisting.
Looking Forward
This solution opens up new possibilities for your Azure applications. Whether you’re building APIs that need to communicate with external services or implementing security measures that require predictable outbound traffic, you now have the tools to make it happen.
Remember, in the world of cloud computing, control and predictability are often worth their weight in gold. With this solution in your arsenal, you’re well-equipped to handle any scenario that requires consistent outbound IP addresses. So, the next time you’re faced with IP whitelisting requirements or need predictable outbound traffic, you’ll know exactly what to do. After all, in the cloud, the best solutions are the ones that give you control without compromising flexibility or security.
Happy networking! 🚀