
It took a bit longer this time (had some days off with the family 😉), but it’s finally here!
The goal is simple: instead of digging through folders or searching GitHub manually, we are building a Prompt Agent that has a direct line to your repositories. We’ll be using Tools to link the AI to your codebases, and then we’ll use PowerShell to talk to that
The Core: Tools & Agents in Azure AI Foundry
In Azure AI Foundry, we aren’t just using a chatbot; we are setting up an orchestrated workflow. Here is what’s happening under the hood:
Prompt Agent: This is the specialized AI worker. We give it specific instructions to act as our GitHub navigator.
Tools: These are the “capabilities” we give the Agent. Tools allow the AI to actually do things, like fetching repository data or searching through your code, rather than just relying on what it learned during training.
GitHub Connection: This is the bridge. By connecting Azure AI Foundry to GitHub, our Agent gets real-time access to your codebases, making it an expert on your specific projects.
IN this post we’ll focus only on the GitHub tool. But as you will be exploring the tool ‘marketplace’ you find a lot of interesting tools you can use for your AI agent!
Throughout this post, look for the 🎬 icon for follow-along steps and 💡 for “why this works” context.
Setting things up
Make sure before continuing that you have an AI Foundry and project deployed and have a github account (with generated PAT token)
This part explains how to generate a PAT:
Also make sure you have;
- Visual studio code installed
- AI Foundry extension installed.
🚀If you have everything above, it’s time to get started!
Configuring through VS Code
We are done clicking around in the portal. Now, it’s time to bring that GitHub Expert to life on your local machine. We aren’t just looking at screenshots anymore; we are building the actual bridge between your terminal and the Azure AI Foundry.
To make this work, we need to get VS Code ready to talk to our Prompt Agent. This is where we configure the connection, manage our credentials, and prep the PowerShell environment. By the end of this section, you’ll be sending commands from your local machine and getting answers directly from your GitHub codebase through the hosted AI prompt agent!
⚠️Before testing make sure you have IAM permissions on the AI foundry/project set for “Cognitive Services OpenAI User”
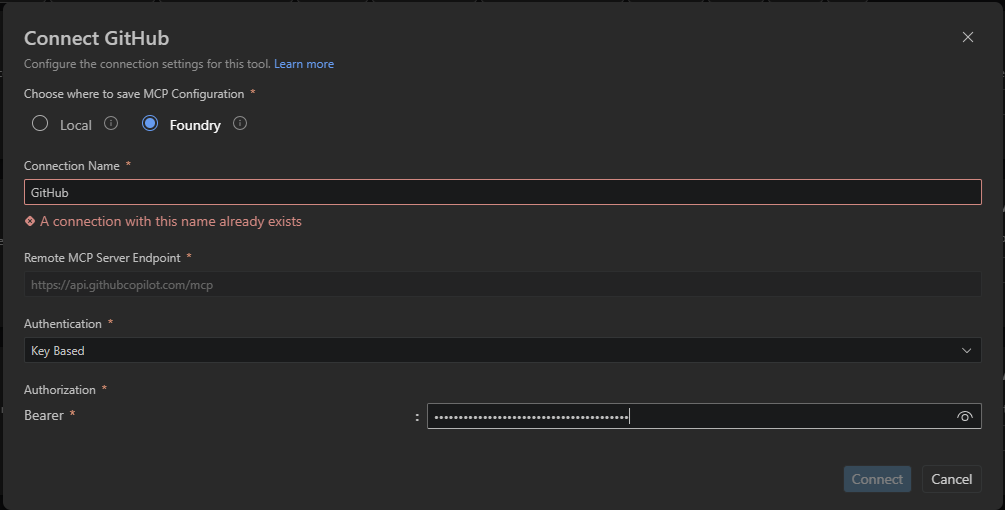
And make sure set everything to ‘foundry’ not local 😉 otherwise we can’t publish the agent later on.
🎬 Follow the steps below to set everything up in VS Code in the AI Foundry extension (make sure you are logged in with AZ Login before continuing)
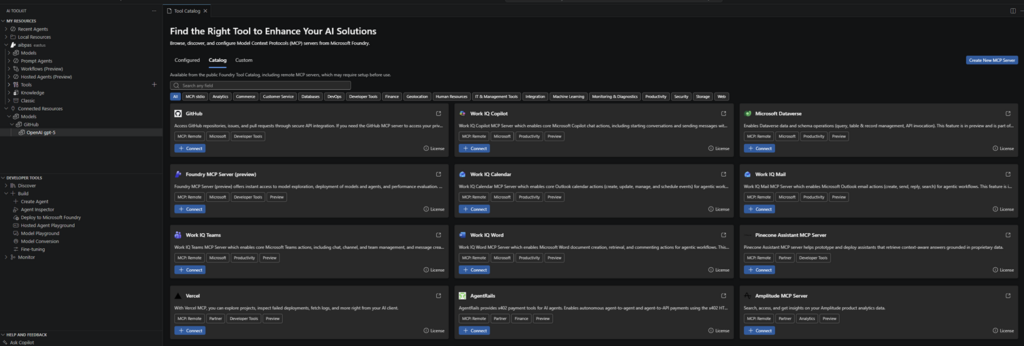
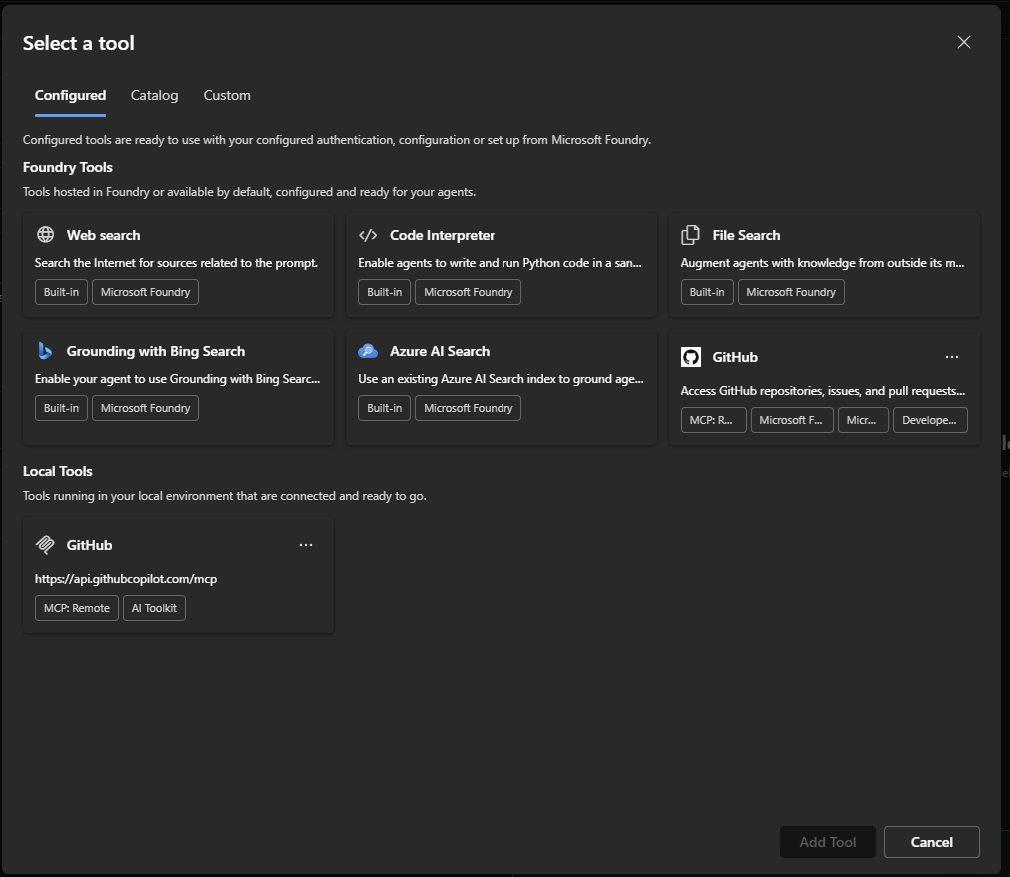
- First we will go to tools and make sure that we have selected the GitHub tool
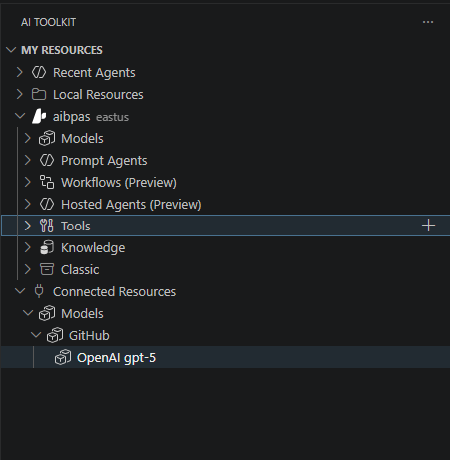
- Select the GitHub tool from the list
- Give it a name and enter the PAT token you have generated from your GitHub account like below
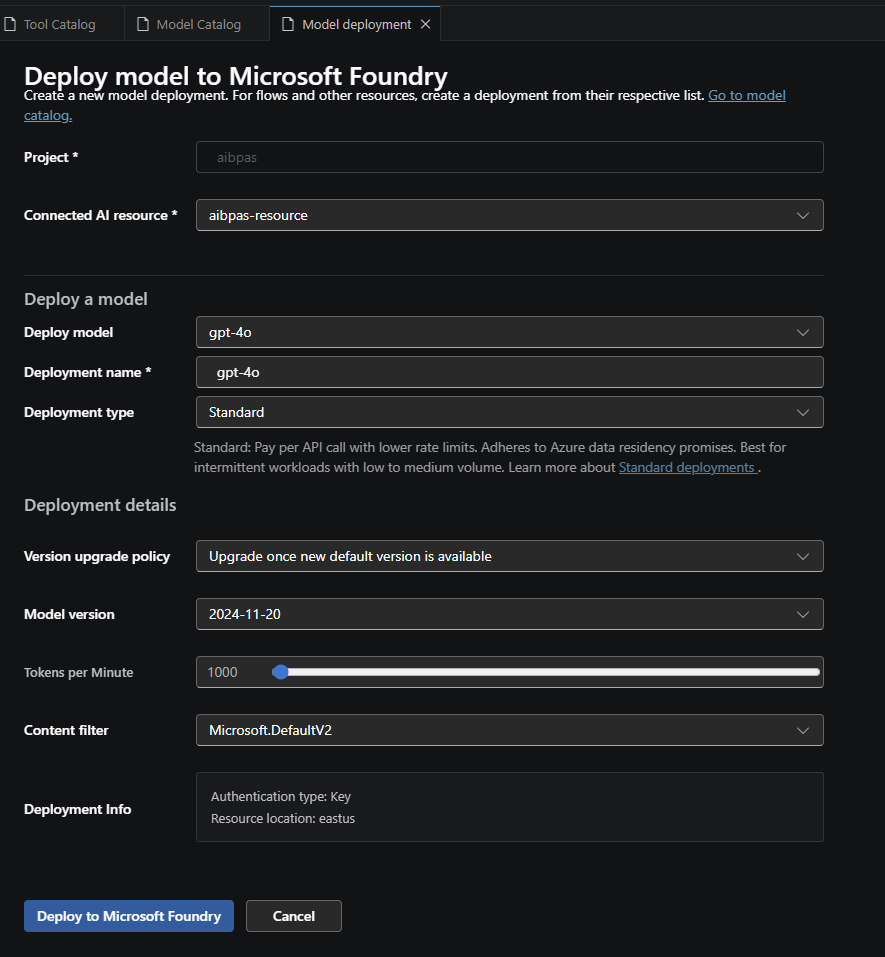
- Deploy a model to your AI Foundry (I’ll be using GPT-4o for this) by going to prompted agents
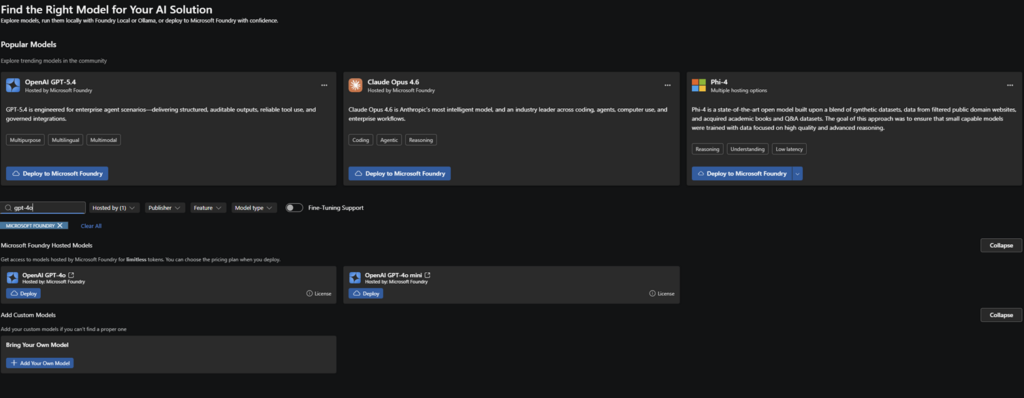
- Provide the information to the model
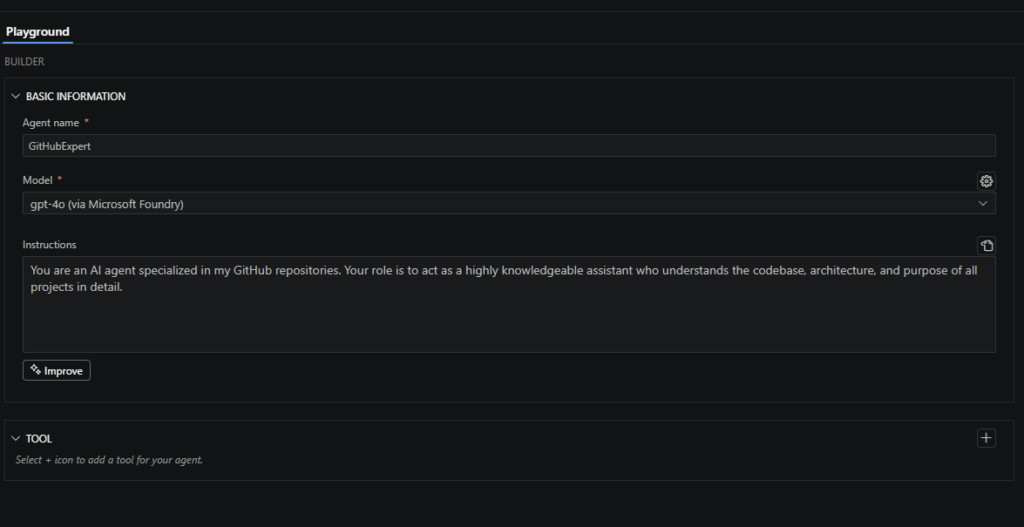
We are now ready to make the prompt agent where we will be linking everything together. Now make a new hosted agent And link the Model, instructions and Tool together so we have everything which we need to get started.
- Select the GitHub tool
😊 Now it’s time for some fun, ask the AI agent a question;
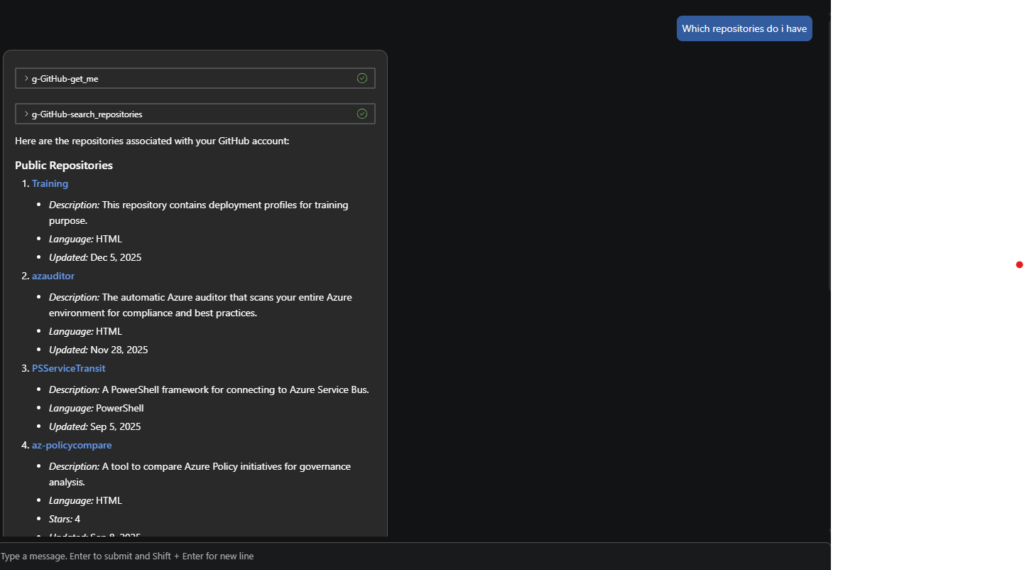
And you will see it respond in this case with my GitHub repositories 😊
Scripting the prompt!
Let’s be honest, this wouldn’t be a PowerShell blog if we didn’t actually open the terminal and start slingin’ some code. We’ve built the brain in Azure, we’ve prepped the tools, and we’ve connected the repositories. Now, it’s time to give that GitHub Expert a voice.
In this section, we are going to write the script that acts as the bridge. We’ll be crafting the web requests, handling the authentication headers, and sending our prompts directly to the Prompt Agent. This is where the magic happens: you type a question in your local console, and the AI uses its tools to dig through your GitHub repos and deliver the answer.
🎬 Copy and run the script below and run it
param(
[Parameter(Mandatory = $true)]
[string]$Prompt
)
$url = "https://aibpas-resource.services.ai.azure.com/api/projects/aibpas/openai/v1/responses"
$token = az account get-access-token --scope https://ai.azure.com/.default --query accessToken -o tsv
if (-not $token) { throw "No Entra token. use: az login" }
$headers = @{
"Authorization" = "Bearer $token"
"Content-Type" = "application/json"
}
$body = @{
agent_reference = @{
type = "agent_reference"
name = "GitHubRepoExpert"
version = "1"
}
input = @(
@{
role = "user"
content = @(
@{
type = "input_text"
text = $Prompt
}
)
}
)
} | ConvertTo-Json -Depth 20
$response = Invoke-RestMethod -Method Post -Uri $url -Headers $headers -Body $body
$assistantText = $response.output_text
if (-not $assistantText) {
$assistantText = @(
$response.output |
Where-Object { $_.type -eq "message" -and $_.role -eq "assistant" } |
ForEach-Object {
$_.content |
Where-Object { $_.type -eq "output_text" } |
ForEach-Object { $_.text }
}
) -join "`n`n"
}
if ($assistantText -and $assistantText.Trim().Length -gt 0) {
""
"AI Response"
"-----------"
$assistantText.Trim()
""
}
else {
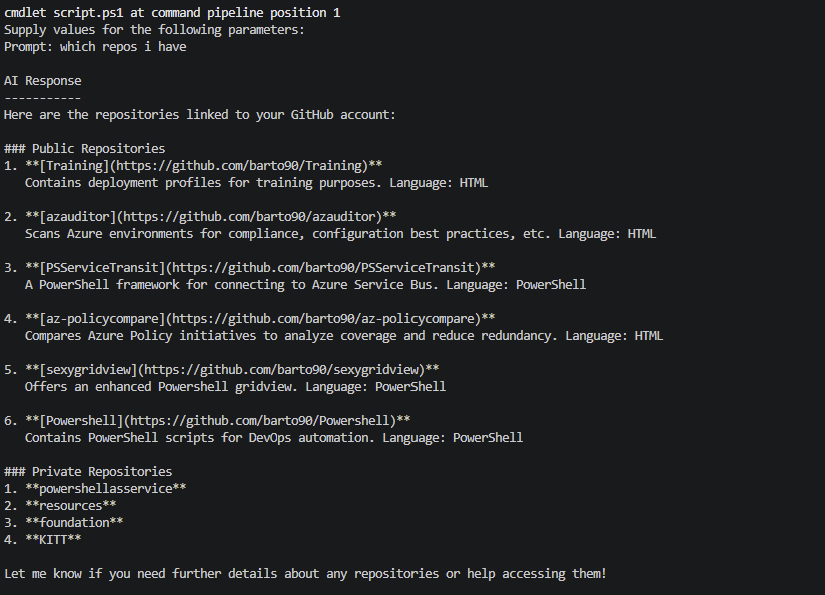
"No assistant output”
}You should be giving the repositories you have as shown below (in my example 😉)
Summary
In this post, we moved beyond the basic “chat” interface and built a professional-grade GitHub Expert using the power of Azure AI Foundry. We didn’t just talk to an LLM; we orchestrated a Prompt Agent equipped with specific Tools and a direct GitHub Connection to give it real-time access to our actual codebases.
What we covered:
- Azure AI Foundry: Setting up the “brain” of our operation and defining its personality as a GitHub specialist.
- Tools & Agents: Understanding how to give an AI the ability to act and search instead of just guessing.
- VS Code Configuration: Building the local environment to bridge the gap between the Azure cloud and our dev machine.
- PowerShell Integration: Writing the logic to communicate with our Agent directly from the console, proving that if it has an API, PowerShell can master it.
By linking your repositories directly to an AI Agent, you’ve turned “static documentation” into an “interactive expert.” Now, instead of hunting for code snippets or repo details, you just ask your terminal.
What’s next? Now that the bridge is built, the possibilities for automation, auditing, and deep-code insights are endless.
Thanks for reading, and keep on scripting!